Data Loss Prevention (DLP) and Data Access Control (DAC) Policies are custom rules that trigger specific actions when emails are sent or opened.
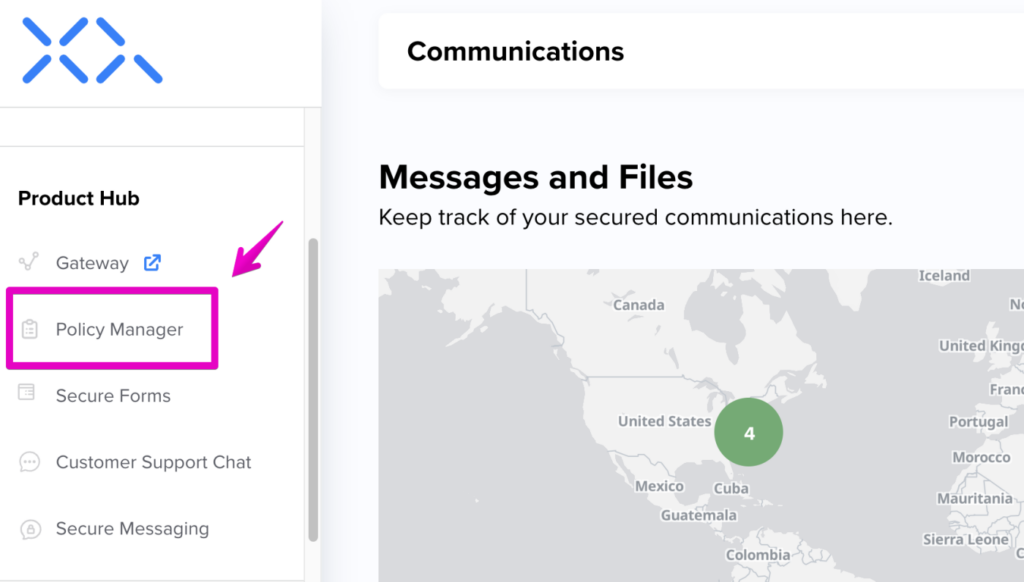
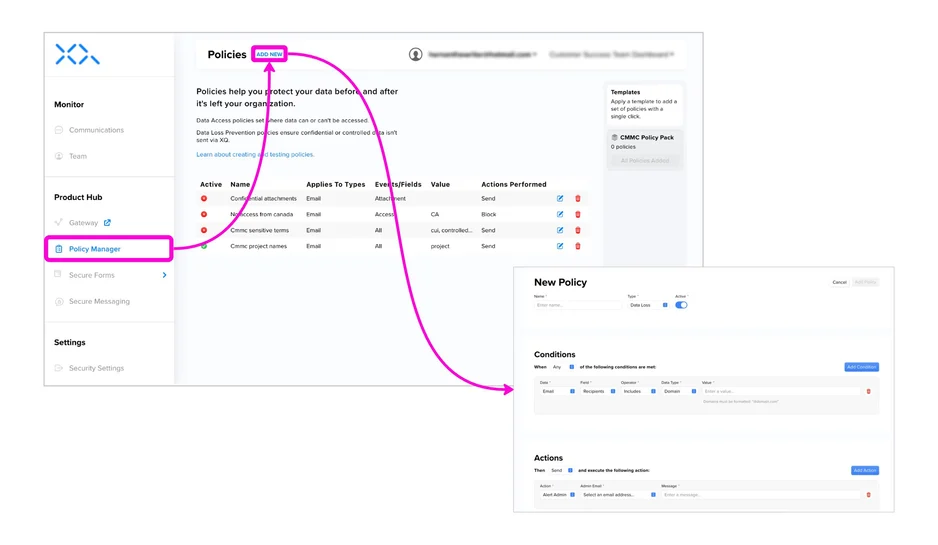
Access the Policy Manager
Using XQ’s Policy Manager, you can configure DLP and DAC Policies right from your team’s XQ Dashboard. Use the following steps to access the Policy Manager in your dashboard:
- In the XQ Dashboard, click Policy Manager in the left-hand navigation bar.
- Click Create Policy to launch the New Policy page.
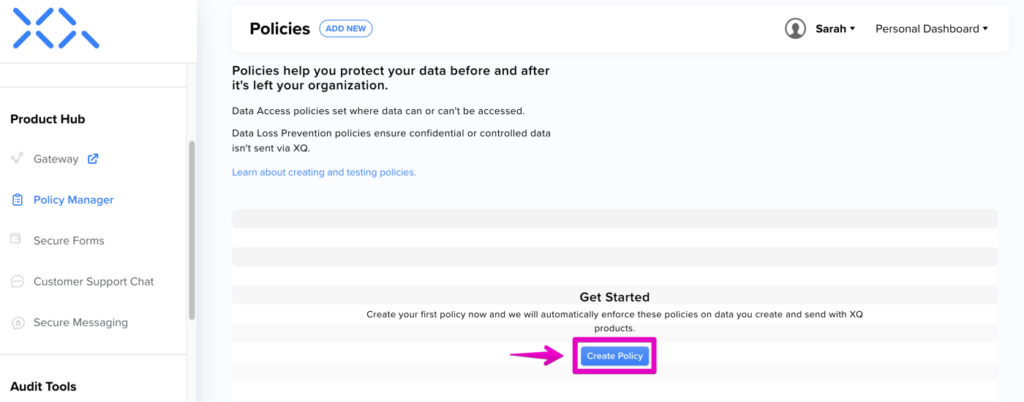
- On the New Policy page, use the Type drop-down menu to choose your policy type. The available types are Data Loss and Data Access.
Create Data Loss Prevention Policies
Creating Data Loss Prevention (DLP) Policies in XQ ensures the protection of your data using automated encryption. With XQ, you can secure your data anywhere it travels.
Create a new policy
Use the following steps to create a Data Loss Prevention (DLP) Policy:
- Launch the Policy Manager in your XQ Dashboard and click Create Policy.
If you have already created a policy, click the ADD NEW button at the top of the page.

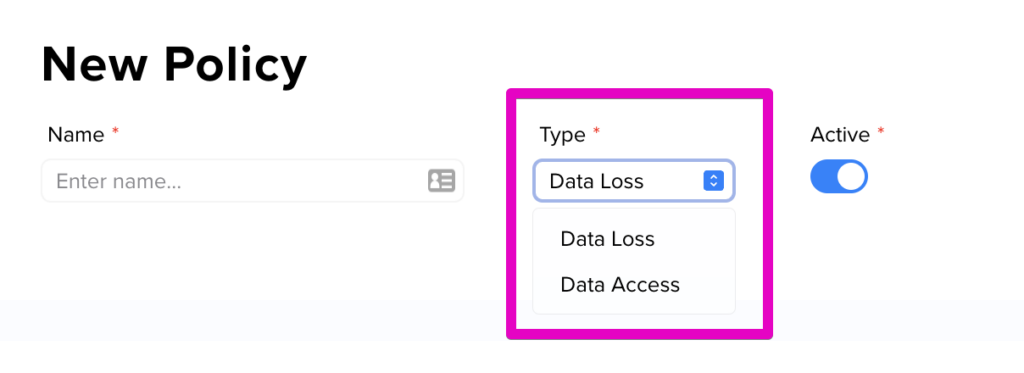
- On the New Policy page, name your policy for future reference and select Data Loss from the Type drop-down.
- Choose your policy’s Conditions. Conditions control which criteria must be met to activate your policy. You can choose between these options:
- Data – Data Loss Policies only apply to Email.
- Field – What field is being referenced in your email? You can choose whether to reference the recipients or the contents within the message itself.
- Operator – Select the available operator from the drop-down. The operator works by triggering your policy if the Data Type includes your chosen Value. Operator options change depending on the field you choose.
- Data Type – Choose whether to allow or restrict email access based on your chosen Field. The options will change depending on the field you choose. For example, if your field is Recipients, you can choose between Domain and Email Address. If your field is Body, you can choose between Keywords and Pattern.
- Value – Depending on your chosen Data Type, enter a value or select from the dropdown list.
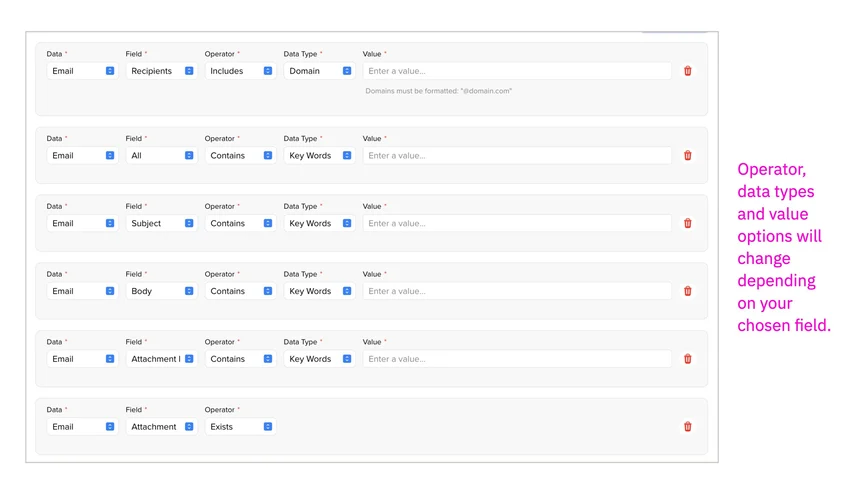
- You can add more conditions by clicking Add Condition in the top-right corner. If you have more than one condition, you can choose whether All or Any conditions are met to then trigger your action. You can also add more than one condition if necessary.
- Choose whether to Send or Block the message. For example, if you want to prevent team members from sending messages containing specific keywords, select Block.
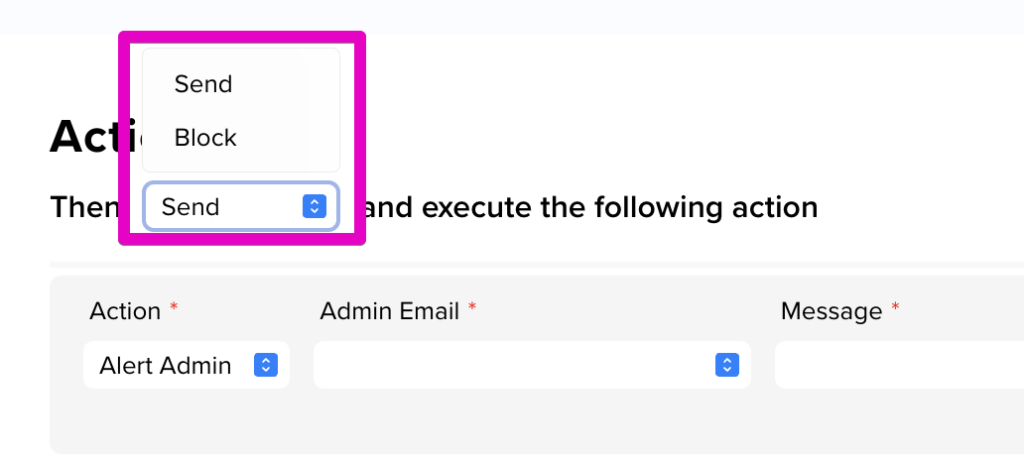
- Then, choose to execute any of the following actions:
- Alert Admin – This action sends a customized email to a specific admin.
- Notify User – Notifies the user who created the message. You can customize the message that is sent.
- Log – Log this event in the event log. You can customize the message included in this log.
- Auto-Encrypt – Automatically encrypts the message. It will only appear if the policy action is to send.
- You can add more actions by clicking the Add Action button in the top-right corner.
- Finally click Add Policy at the top-right corner of the page to save your Data Loss Prevention Policy.
Create Data Access Control Policies
Data Access Control (DAC) policies empower the system administrator to set rules for accessing a resource. These rules are established by assigning permissions to designated users. With DAC policies, the administrator can determine who can access the resource and the level of access they are permitted.
Create a new policy
- Launch the Policy Manager in your XQ Dashboard and click Create Policy If you have already created a policy previously, click the ADD NEW button at the top of the page.
- On the New Policy page, name your policy for future reference and select Data Access from the Type drop-down.
- Choose your policy’s Conditions. Conditions control which criteria must be met to activate your policy. You can choose between these options:
- Data – For Data Access Policies, choose Email or Vault.
- Event – For now, you can only choose Access.
- Operator – Choose to trigger your policy if the Data Type is From or Not From a country or IP address.
- Data Type – Choose whether you’re allowing or restricting access based on Countries or IP’s.
- Value – Depending on your chosen Data Type, you can select countries from the dropdown, or you can input an IP address or an IP range.
Use the following format for IP: 192.0.0.1-192 or 192.0.0.0/24 or 192.0.0.*
- Choose whether to Allow or Block if your conditions are met.
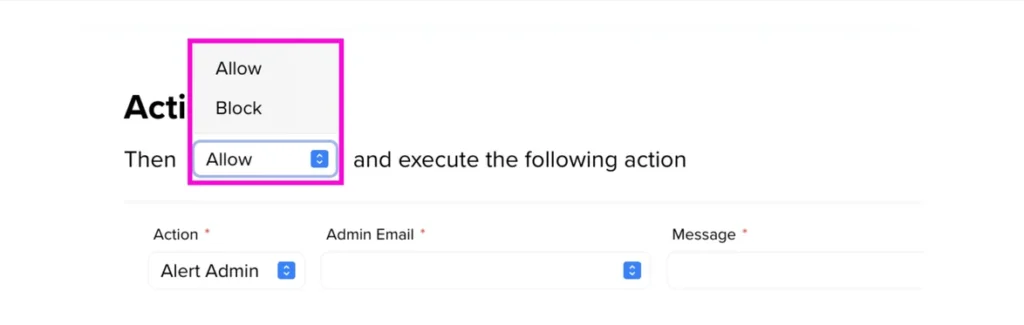
- Choose an Action. The available options include:
- Alert Admin – This action sends a customized email to a specific admin. Optionally, you can include ‘$User’ in your message to display the email address of any user attempting to send a message affected by your policy (eg. $USER tried sending a message with the word ‘password’ included).
- Notify User – This action notifies the user who created the message. It will only appear if the policy action is to block. You can customize the message that is sent.
- Log – This action logs this event in the event log. You can customize the message included in this log.
- You can add more actions by clicking the Add Action button in the top-right corner.
- Click Add Policy at the top-right corner of the page to save your Data Access Control Policy.
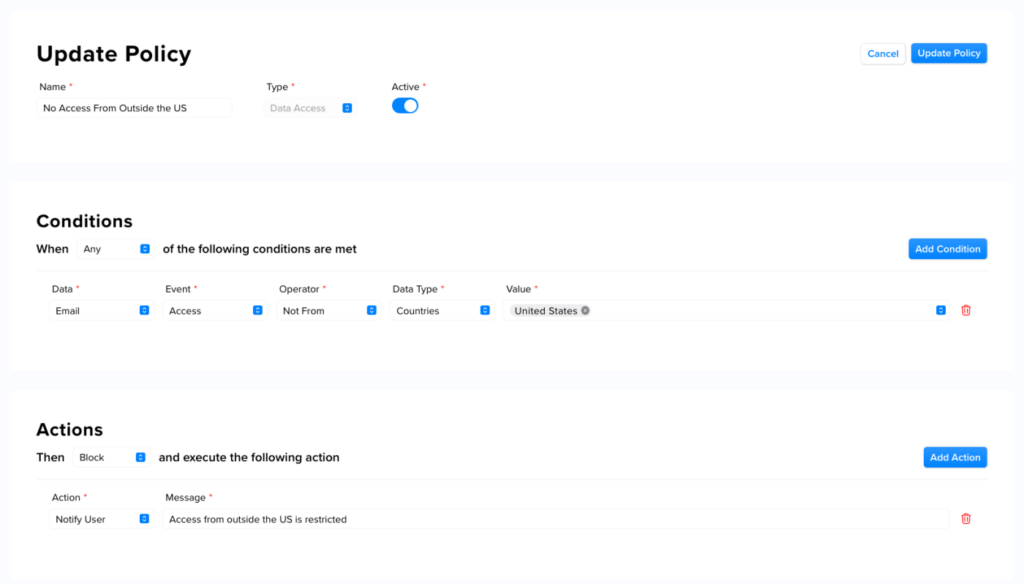
Best practice recommendation: Location-based restriction
Location-based restriction policies enable you to limit access to resources based on geographical location. These policies prevent unauthorized individuals located outside the designated geographical location from accessing the resource.
This example shows a location-based restriction policy that restricts data access from outside the United States:
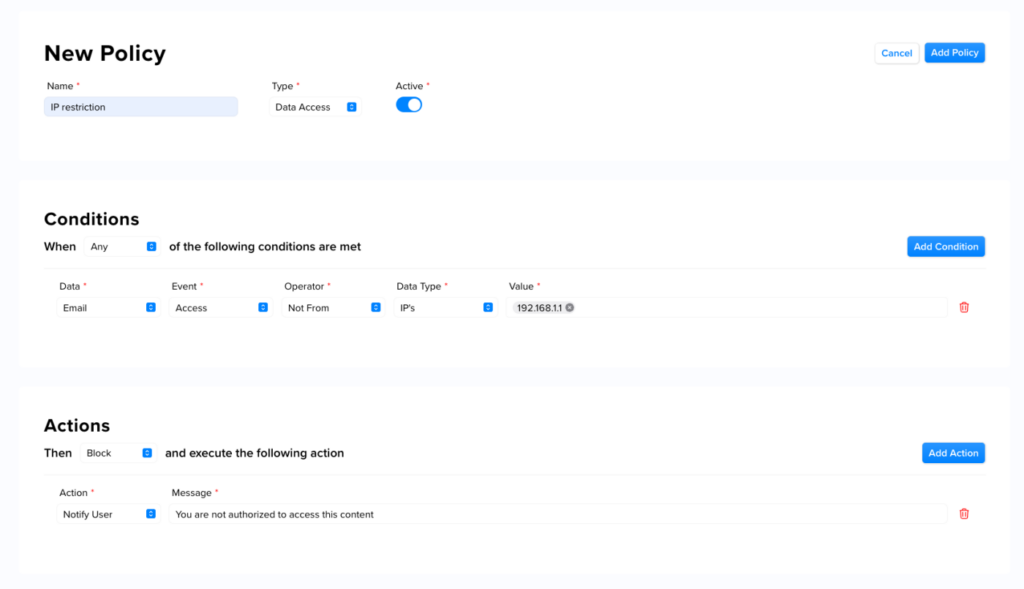
Best practice recommendation: IP address restriction
Further limiting access through IP address restrictions provides a more secure way of controlling user access. When implementing this type of policy, specific IP addresses are designated as authorized for accessing a resource. Attempts to access data from an unapproved IP address will be blocked.
This example shows an IP address-based restriction policy that restricts data access to one authorized IP address:
Leave a Reply