XQ Secure Chat is the world’s first Zero Trust Chat platform. Secure Chat allows you to communicate securely with both team members and guest users.
Overview
XQ Secure Chat is the first Zero Trust Chat that allows you and your teams to collaborate safely and communicate securely. There are several key features that make Secure Chat transparent, trackable, and compliant:
- End-to-end encryption – Every message is encrypted with its own unique key, meaning that only the intended recipient can decrypt the message.
- Communication tracking – Secure Chat keeps a log of data on each message for who read it, when they read it, and where it was shared.
- Delete messages permanently – Once you choose to delete a message, not even XQ can restore the conversation.
Accessing Secure Chat
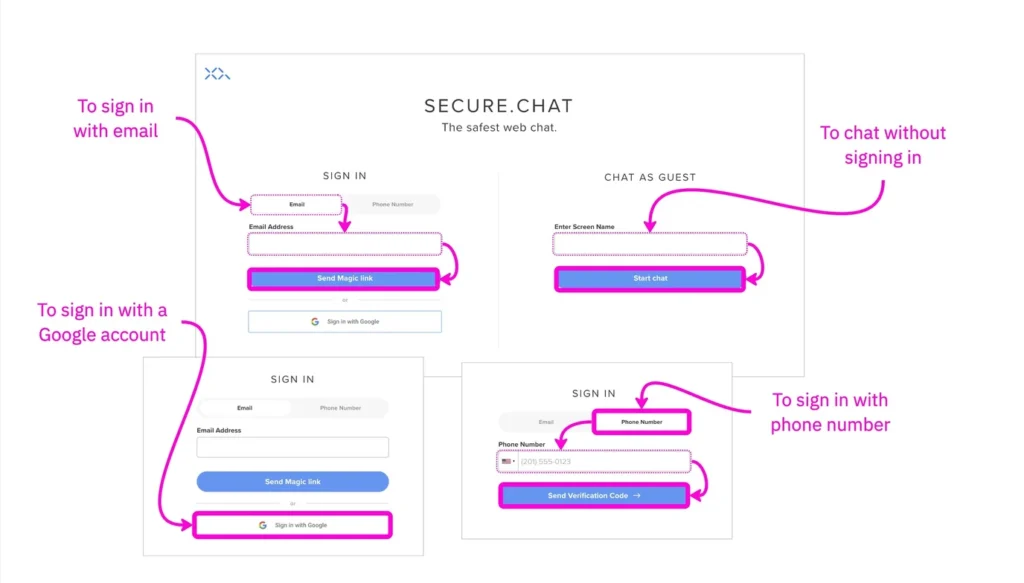
- Go to secure.chat from your browser in desktop or mobile.
- You can send secure messages by signing in or chat as guest.
- On the SIGN IN section, you can sign in using a magic link sent to your email address, a verification code sent to your phone number or Google single sign-on.
- On the CHAT AS GUEST section, you can enter the name you want to be visible in the conversation. If you leave it blank, the system will generate a random string and prefix it with ‘guest-‘. Click Start chat.
Sending messages
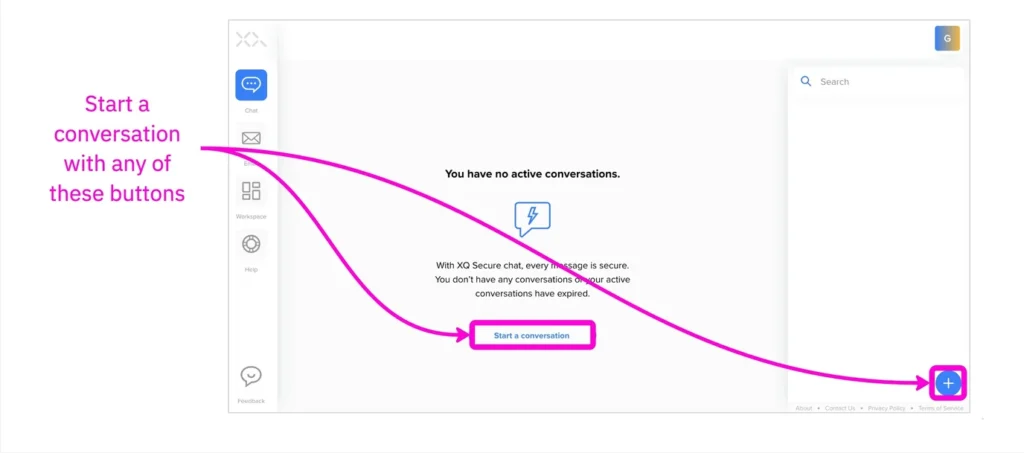
- To start a conversation click the + button at the bottom right of the screen. Alternatively, if you are not on a mobile screen, you can click the Start a conversation button.
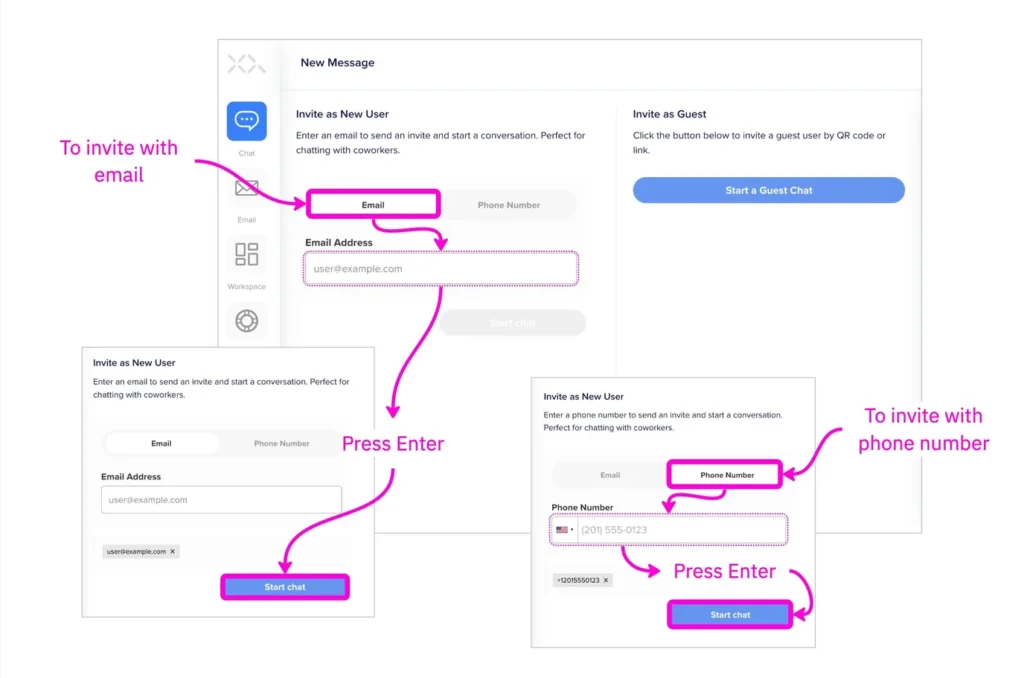
- On the New Message screen, you have the option of invite a new user that needs to sign in or invite a guest to your conversation.
- To invite as a new user, enter the recipient’s email address or phone number, press Enter, and click Start chat.
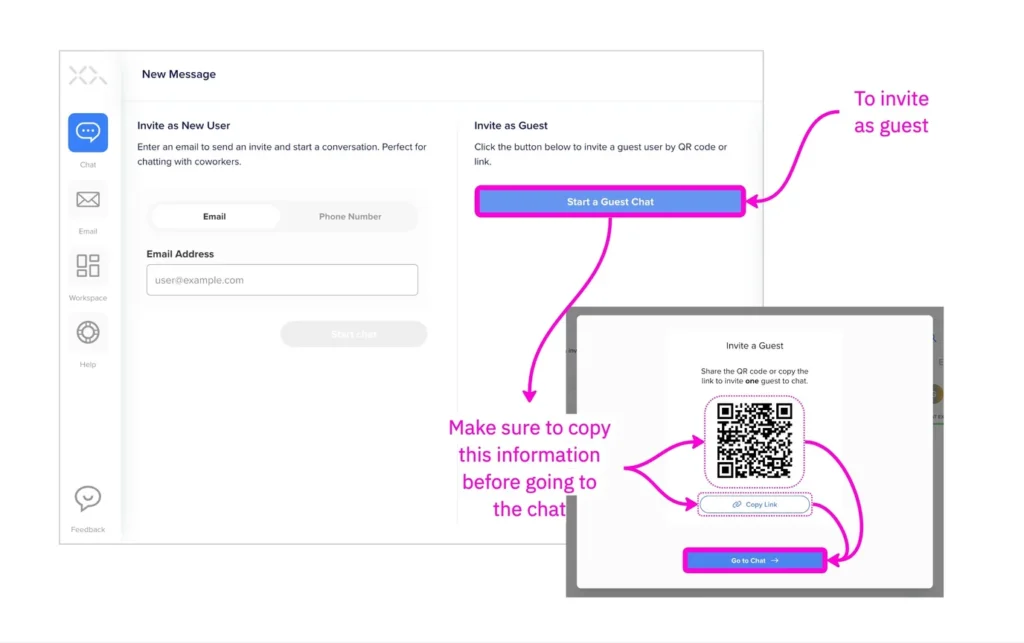
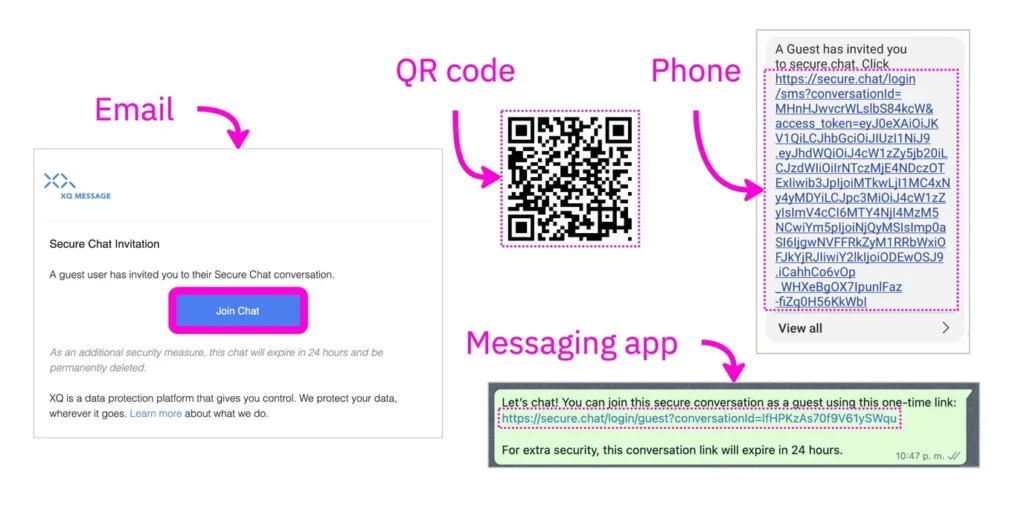
- To invite as a guest, click Start a Guest Chat. A pop-up will open with the information to invite one guest to the chat. There are two options to invite a guest to the conversation: You can share the QR code or click the Copy Link button and paste the information into a messenger app or email. After you invite your guest, click the Go to Chat button.
- The users you invite to the chat will receive your invitation to join after you send the first message. They only need to follow the link and the conversation will open. Each message is encrypted with its own unique key to ensure only the intended recipient can view the message.
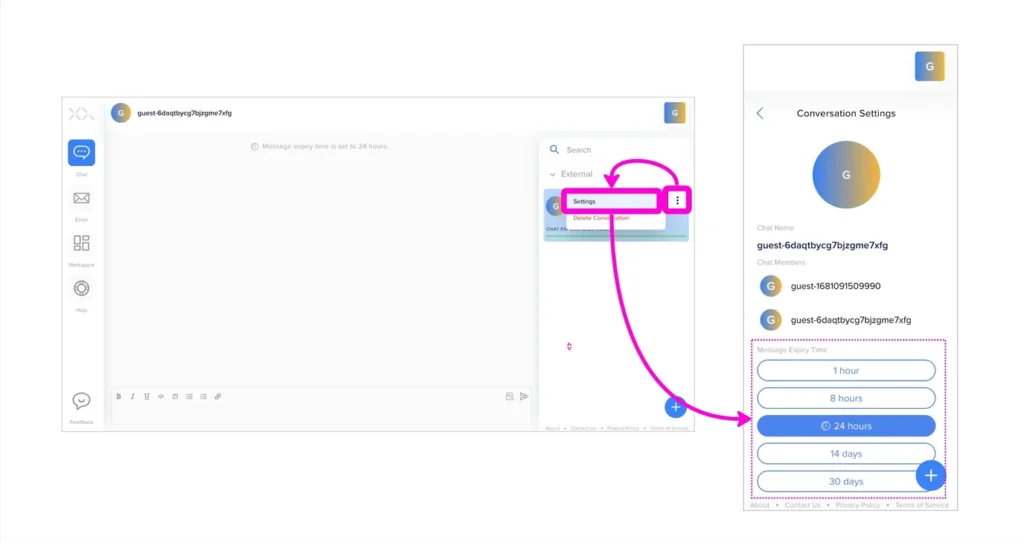
- By default, the chat expiration time is set to 24 hours. To change it, click the three-dots icon and select Settings. From the Settings menu, select a new expiration time.
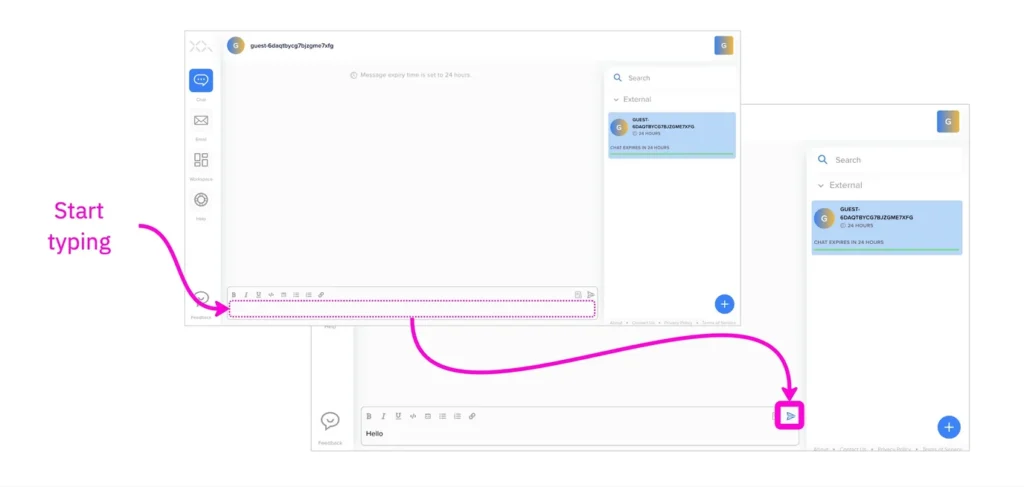
- You can start the conversation by typing a message in the bottom text field. To send it, press Enter or select the paper plane icon that turns blue once you start typing.
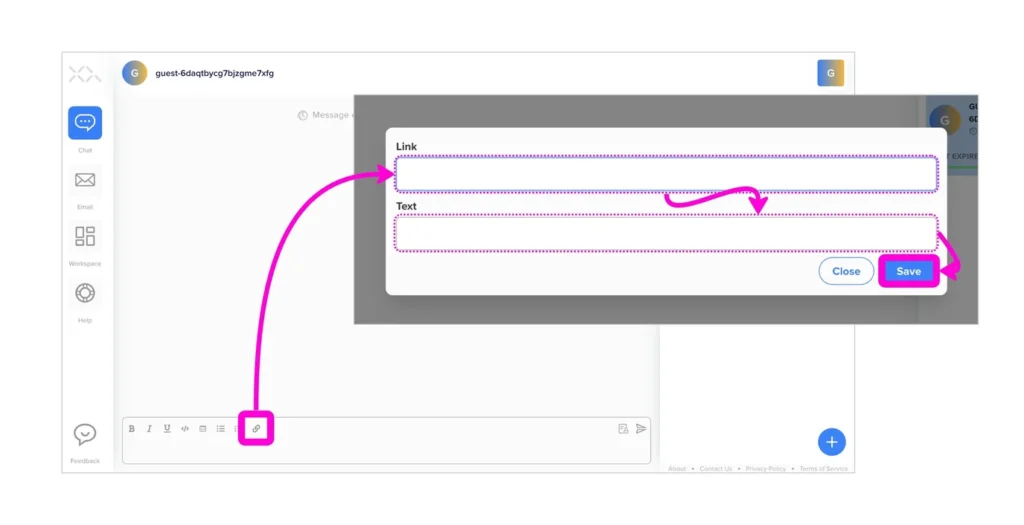
- Additionally, you can use the File attachment icon to send a file via Secure Chat.
- When your chat is complete, click on the three-dots icon and select Delete Conversation. This permanently deletes the chat conversation and the chat can never be recovered. If you do not delete the conversation, all messages will expire according to the chat’s expiration settings.
- You can also delete individual messages by hovering over the message, clicking on the three-dots icon, and selecting Delete Message.
Managing multiple conversations
You can start and use multiple different chat sessions at one time. To start additional chat sessions, click the + icon and invite a new user. The new chat will appear in the right-hand chat management menu and you can switch chats by clicking on the desired chat from the list.
Each conversation has its own settings and can be deleted independently.
