As an administrator, you can choose the SharePoint site where the email content from Outlook will be offloaded. Here are the steps:
- Log in at admin.microsoft.com. In the left column, click Show all. Scroll down and click SharePoint to open your SharePoint admin center.
- Click on Policies > Sharing.
- Set External sharing to Anyone.
This is setting the maximum for sharing. The setting for new sites will still default to ‘New and existing guests.’ You can still manage sharing settings for each SharePoint site independently. In step 7 below, do this for the Offloading site you will create in step 5.

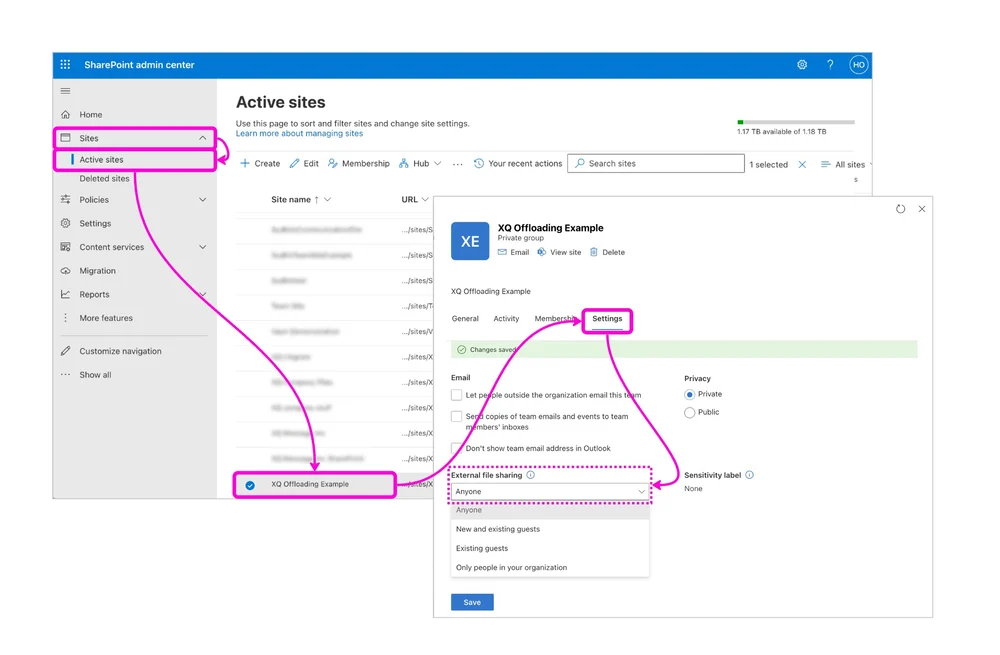
- Click on Sites > Active Sites.
- Click ‘Create +’ to create a new site with the following options:
- Team Site
- Standard Template
- Name the site XQ Offloading (if you have a standard naming convention within your org, you can use that, ‘XQ Offloading’ is just a suggestion.)
- Add an owner. We recommend using a service account for the owner (MS Admin). This same account will be required below in step xx for authorizing XQ.
- Privacy Settings: Private
- (optional) Members: You do not need to add members to this site. This site is purely a service site for already encrypted content, adding members allows those members to visit this site.
- Once the site has been created find the site in the list of active sites and:
- Click on the row and then Settings.
- Make sure External file sharing is set to Anyone. If it’s not, select Anyone and then Save.
All offloaded content will be encrypted.
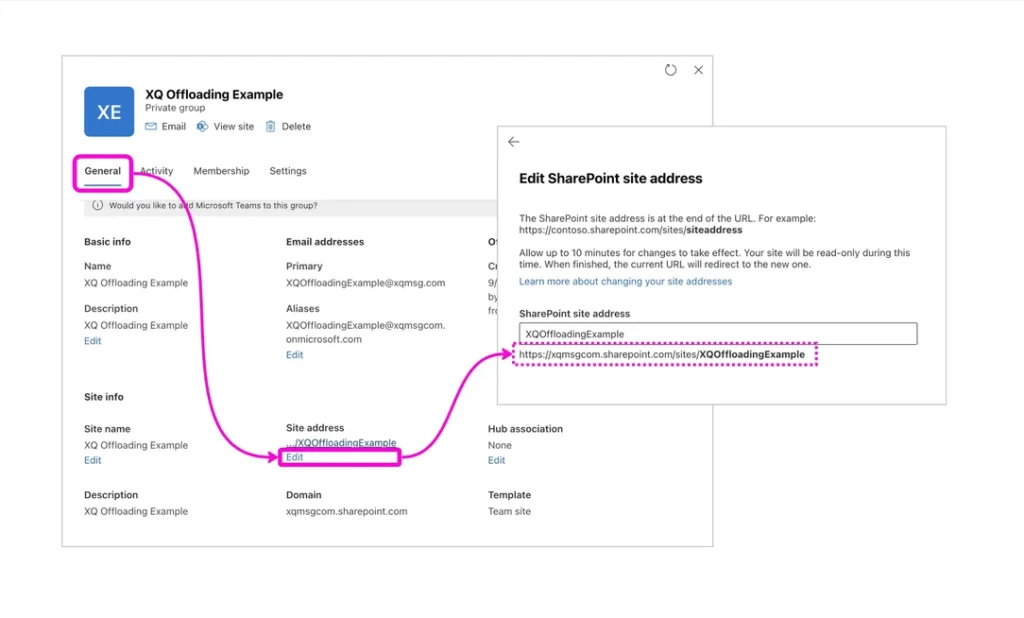
- Select General.
- Click on Edit under Site address.
- Locate the SharePoint site address. You’ll have to copy and paste it in another step.
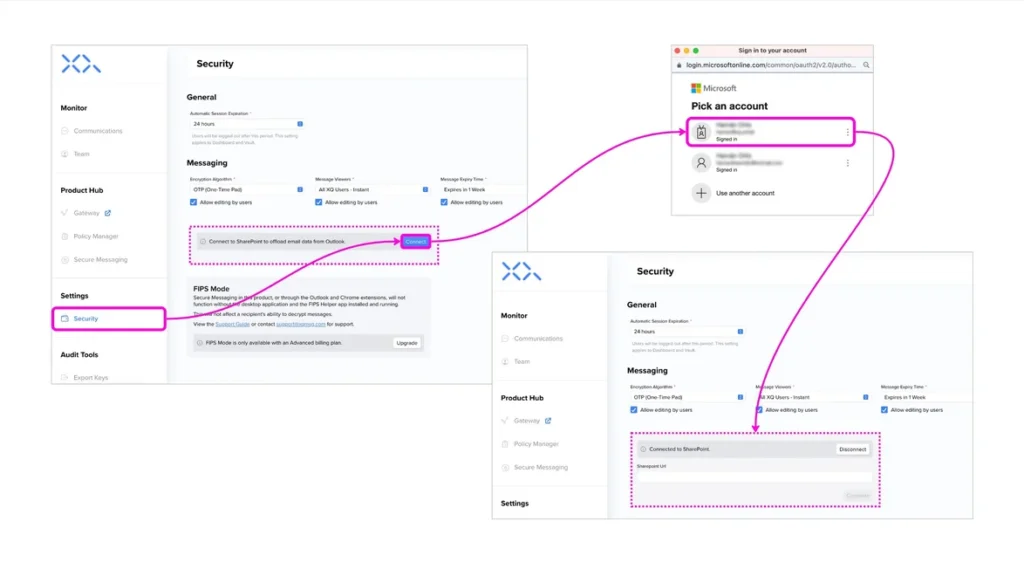
- Log in to the XQ Dashboard.
- Click on Security under Settings.
- Click on the Connect button next to Connect to SharePoint to offload email data from Outlook.
- Log in with the Admin credentials that you used in step 5 above.
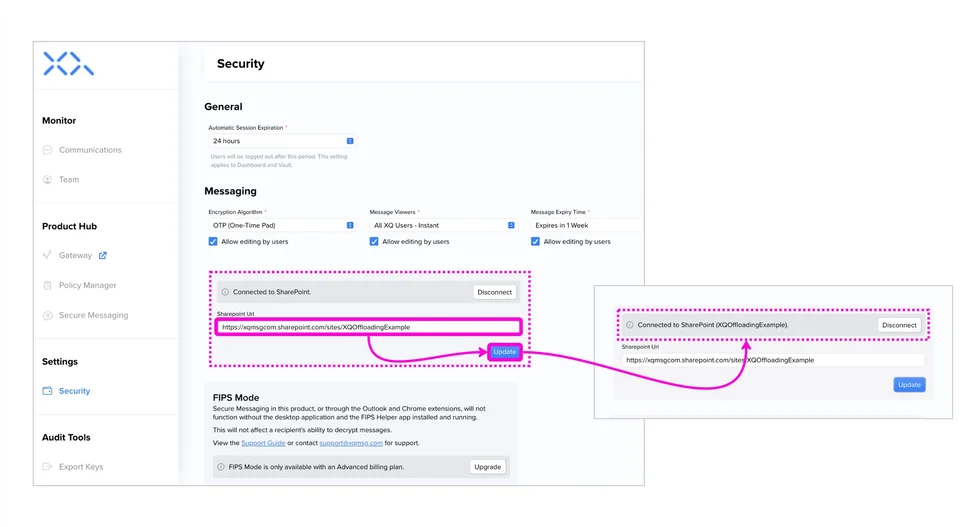
- Once you are connected to SharePoint, copy and paste the URL you found in step 8 and click on Update.
Leave a Reply