The Outlook Add-in allows you to encrypt messages and attachments directly from your Outlook account.
Table of Contents
Install the Add-in
- Open the following URL in a browser tab:
https://outlook.xqmsg.com/latest/manifest-admin.xml
In the browser click File and Save Page As to save an .XML file that you’ll upload later. - Log in to your Outlook account using Outlook on the web.
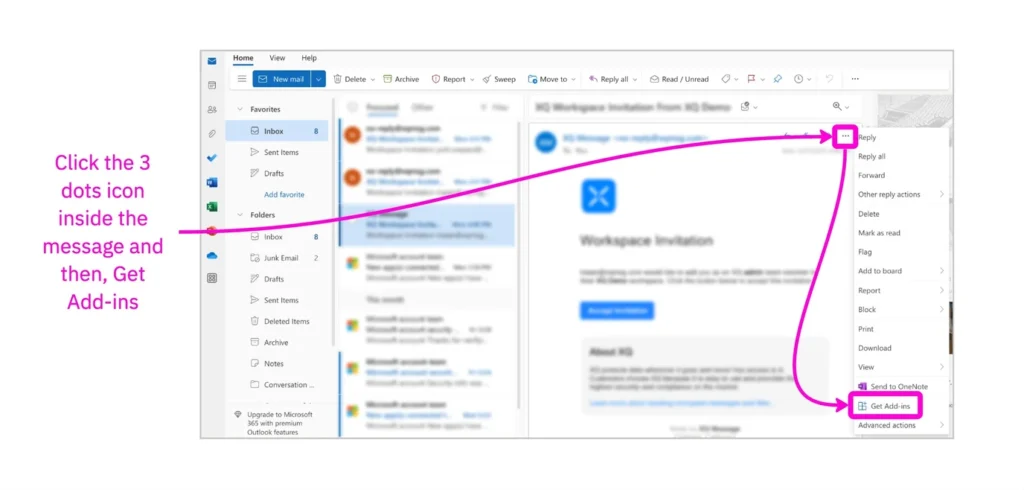
- Open any message in your inbox and click the three-dots icon. In the menu that opens, click Get Add-ins.
Alternatively, or if you are unable to find the options above, navigate to one of the links below to go directly to the next step.
https://aka.ms/olksideload
https://outlook.office.com/mail/inclientstore
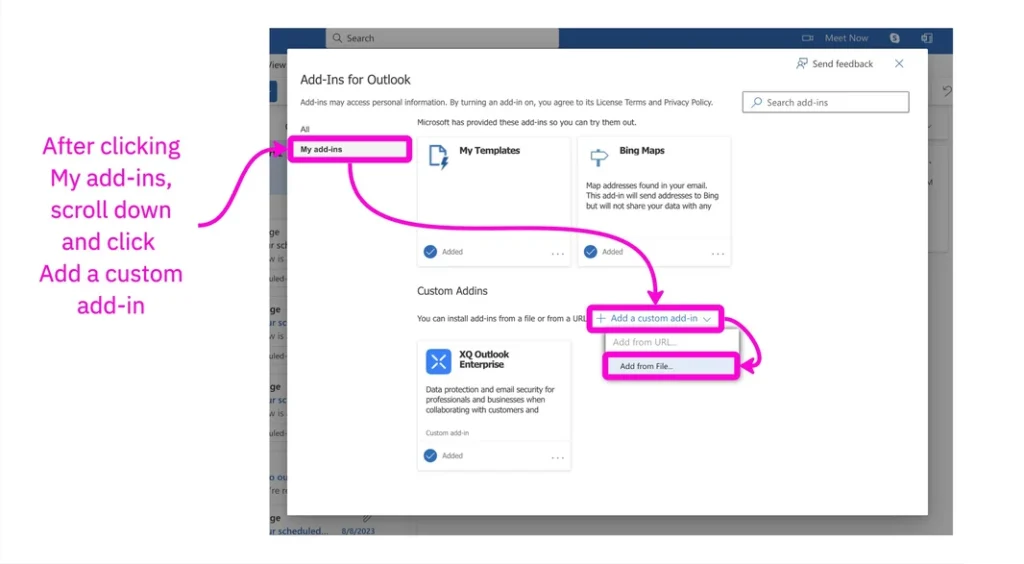
- In the pop-up window, click My add-ins. Scroll down and click Add a custom add-in. Select Add from File… from the drop-down menu.
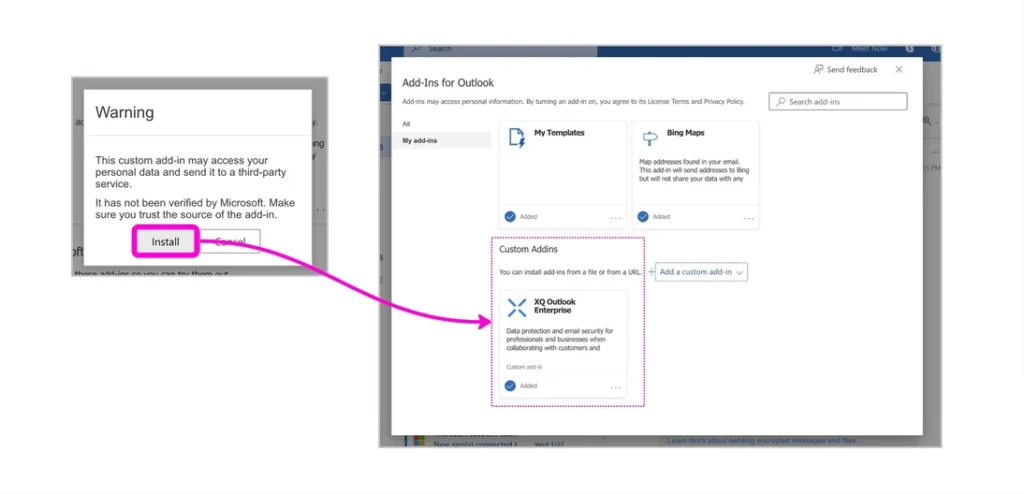
- Select the .XML file you previously saved.
- Click Install on the Warning pop-up window. XQ never stores or transfers your data, so you can be confident that it is always safe and secure.
You will see the add-in under the Custom Add-ins section.
Configure Settings
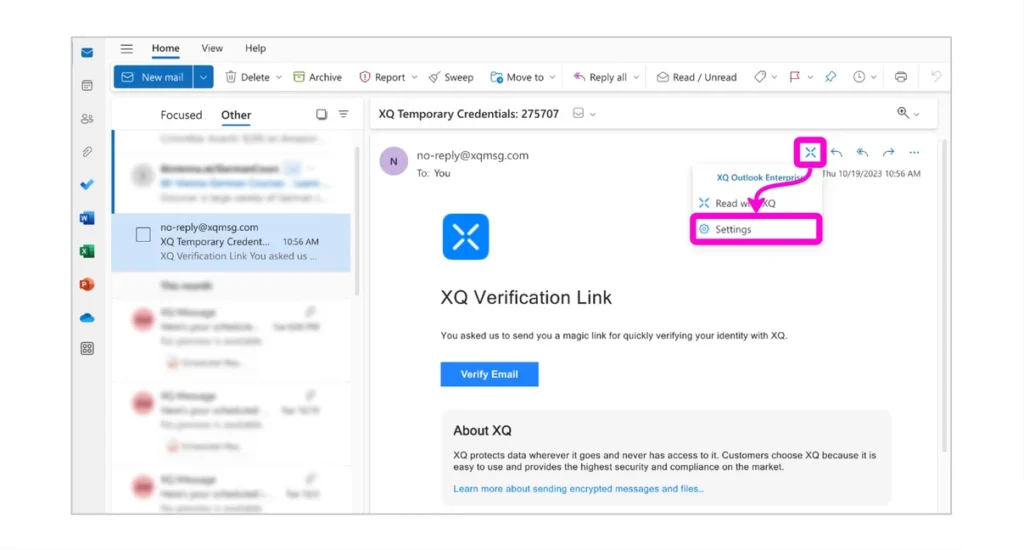
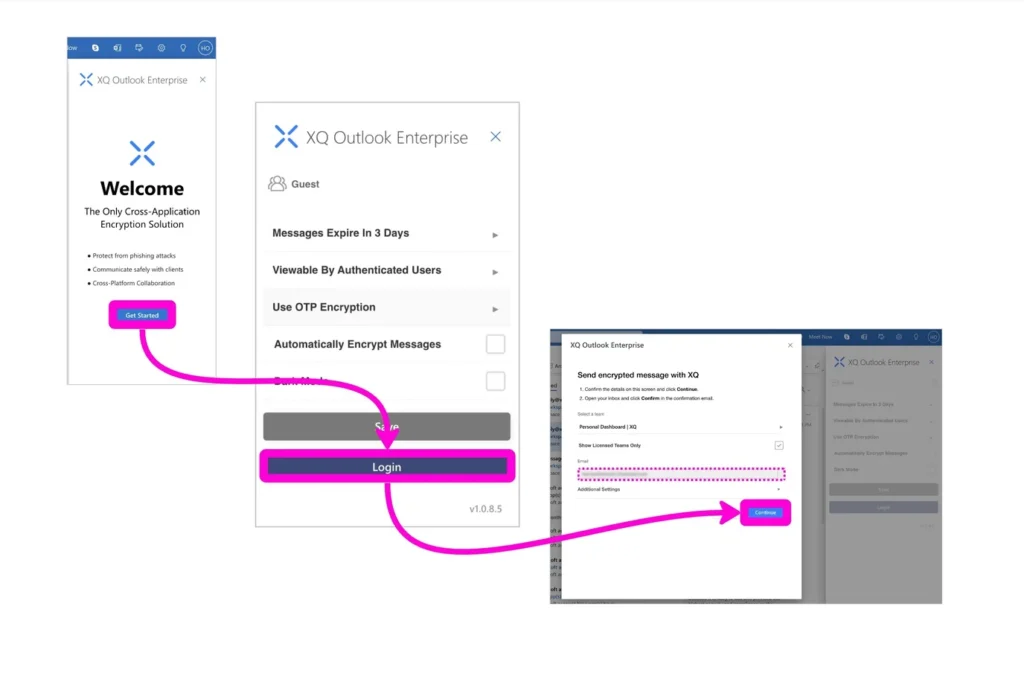
- Open any message in your inbox and click the XQ logo. Then click Settings.
- The XQ Outlook Enterprise will open on the right side. Click Get Started and then Login and Continue.
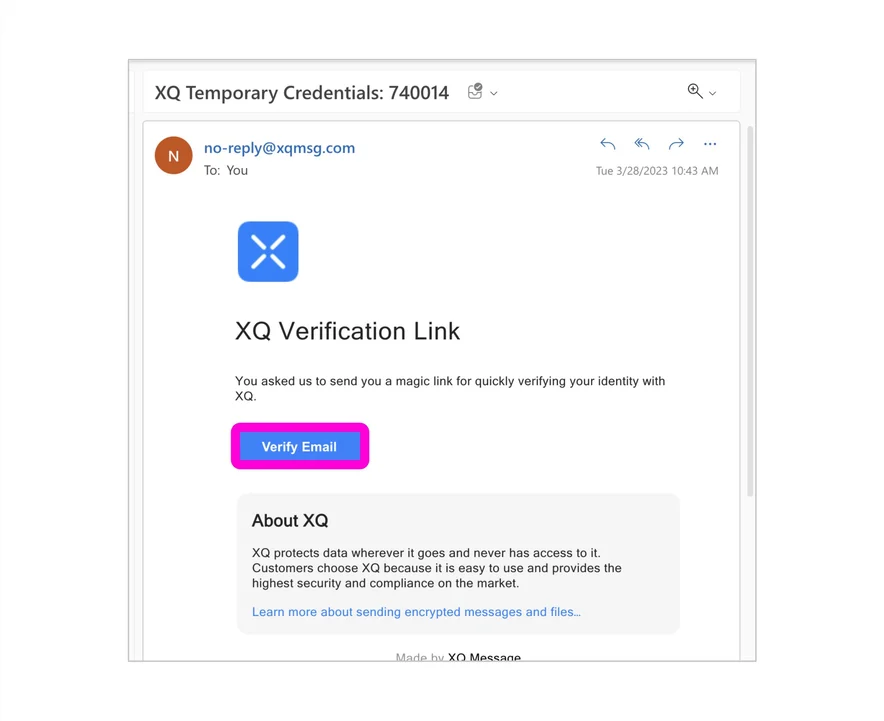
- Open the email from XQ in your inbox and click Verify Email.
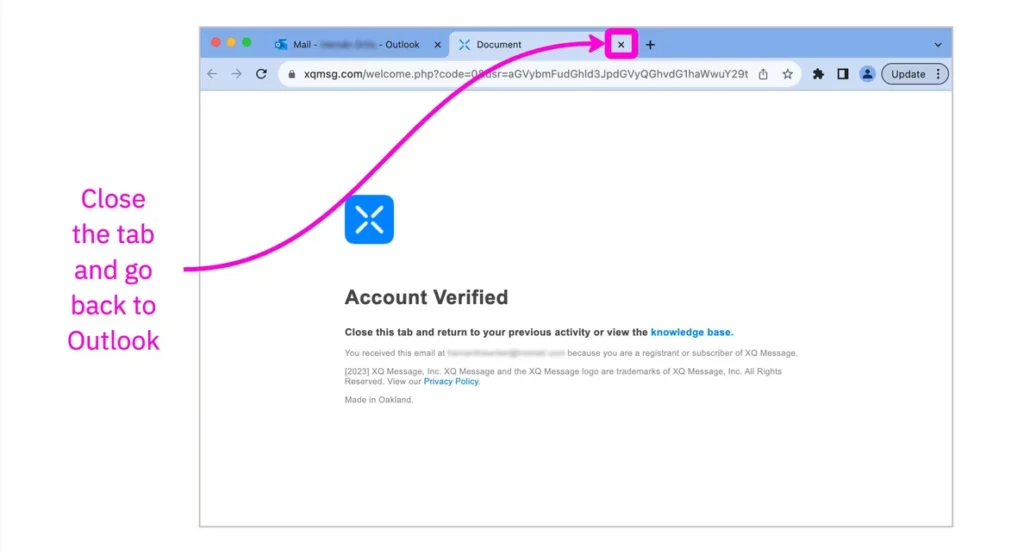
- A new tab will open with an Account Verified message. You can close it and go back to Outlook. You will now be successfully logged in.
- Open the settings menu by clicking the XQ logo inside an email, then Settings.
Available settings
- Messages Expire in 1 Week – Use this setting to change your message expiration time from 1 hour to 3 months.
- Viewable By All XQ Users – With this setting enabled, encrypted messages sent from the Outlook Add-in can be viewed by all eligible XQ Users in your Team Workspace. Click on this setting to change the viewing permissions to Viewable By Authenticated Users if needed.
- Use OTP Encryption – By clicking this setting you can change it to Use AES-256 GCM Encryption if needed.
- Never Offload Messages – This setting is disabled by default, but it is important to enable it because it ensures that long messages, messages with images in the body, and messages with long signatures are delivered successfully to the intended recipient. It works by storing messages in a user’s OneDrive account and sending the recipient a code to retrieve the encrypted message from the OneDrive folder it is stored in. Only addressed recipients can decrypt and access messages stored in OneDrive folders.
To enable the setting, click Never Offload Messages and then select Offload Messages To OneDrive. Click Connect Account, then Allow, and Continue. Finally, sign into your Microsoft OneDrive account.
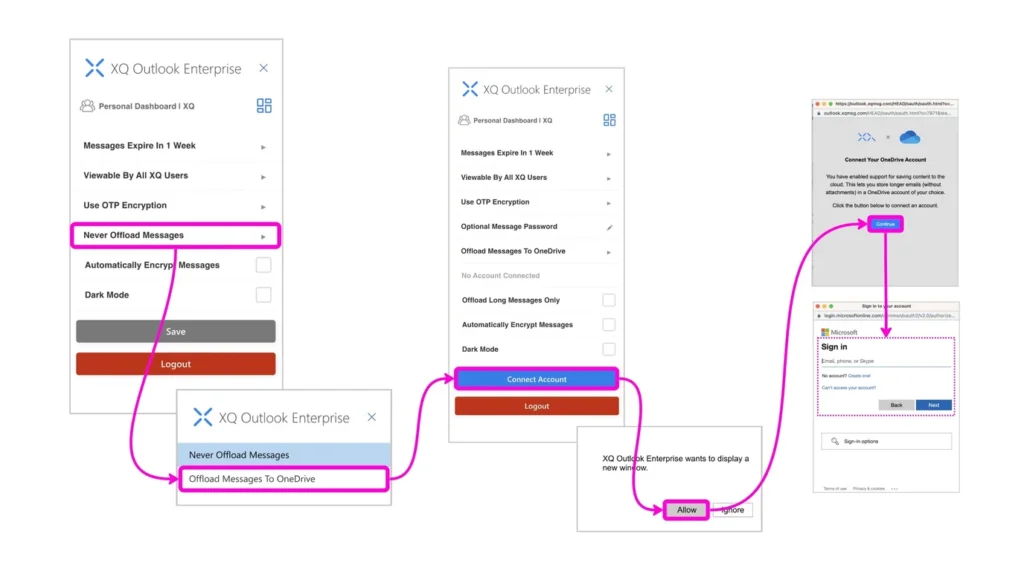
- To disable this setting, select Never Offload Messages.
- You can see the connected One Drive account along with one new option in the settings menu.
- Offload Long Messages Only – When enabled, this setting offload only long messages to OneDrive. Messages with images or long signatures will not offload to OneDrive if you choose to enable this setting.
- Always Confirm Insecure Send – When checked, you’ll get a pop-up box in the middle of the screen when you send a message asking if you want to send the message with or without encryption. When unchecked, it will send messages without encryption (unless there’s a policy that captures some of the content).
- Automatically Encrypt Messages – When checked, this setting automatically encrypts all messages sent via Outlook.
- Dark Mode – When checked, this setting changes the appearance of the XQ Outlook Add-in to Dark Mode.
Make sure to click Save after changing the settings to ensure your XQ Outlook Add-in settings are updated.
Now you’re ready to learn how to send a secure email.