XQ can be installed in your Microsoft 365 Group to allow for seamless integration into your team’s Outlook email accounts. This article provides steps for installing XQ for your Microsoft 365 Group.
Table of Contents
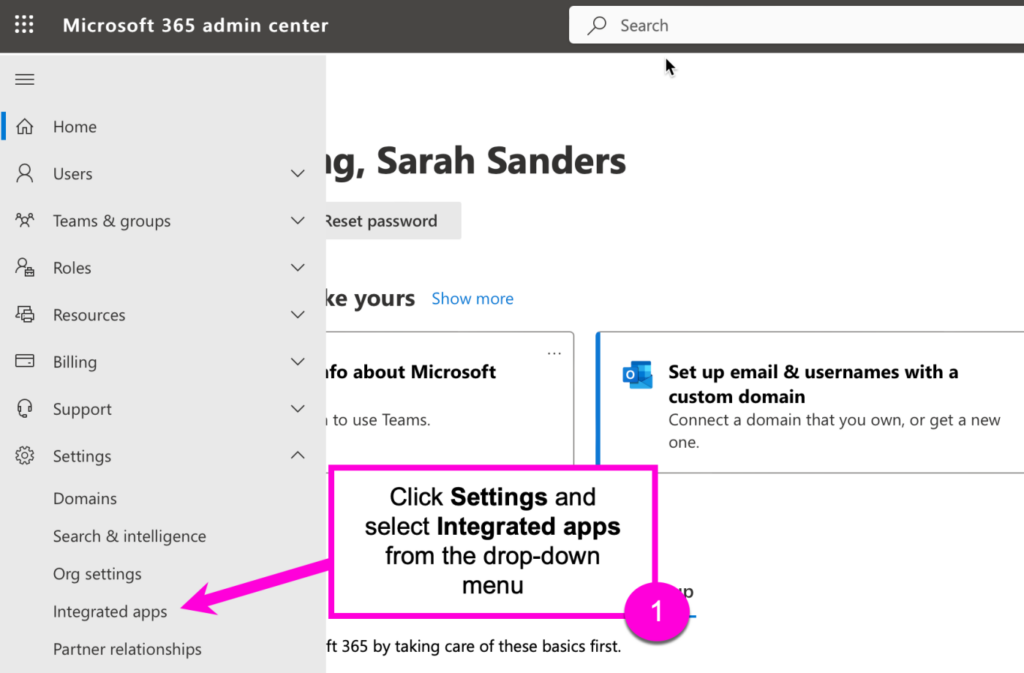
Install with a manifest link
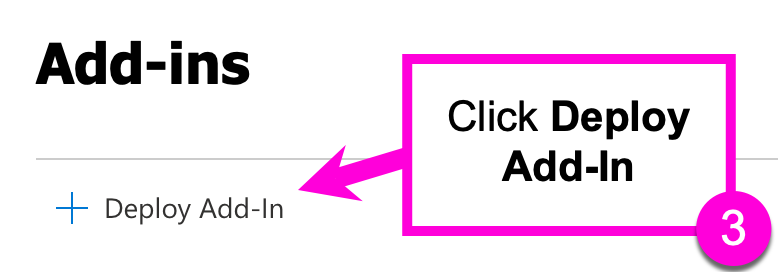
- From the Integrated apps page, click Add-ins.

- From the Add-ins page, click Deploy Add-In.
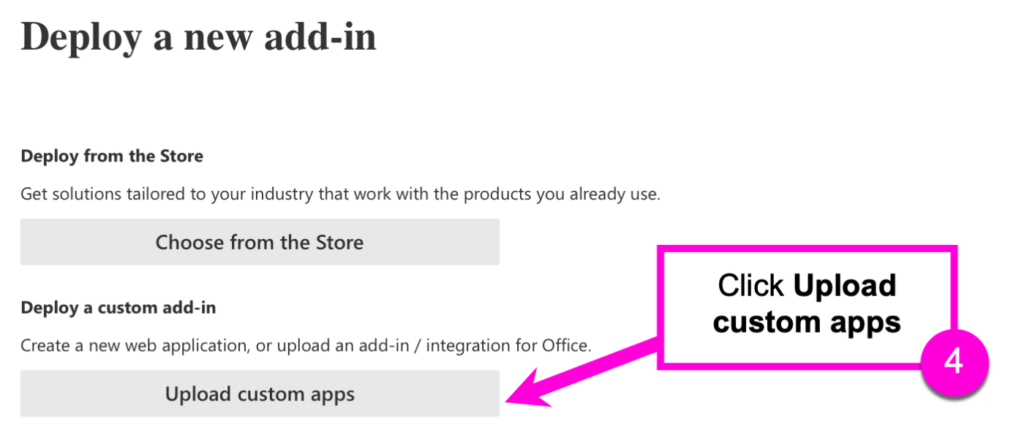
- Click Upload custom apps.
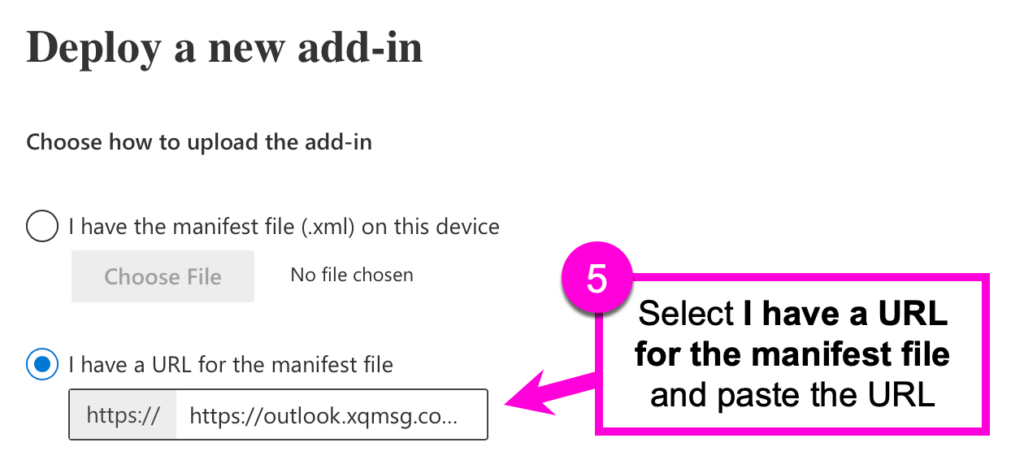
- Select I have a URL for the manifest file. Copy the following URL: https://o365.xqmsg.com/manifest.xml and paste the URL in the text box.
- Click Upload.
- On the configuration page choose an option under Assign Users and select a Deployment Method.
- Click Deploy to start the installation.
Update through the Add-in library
- From the Integrated apps page, click XQ Outlook Enterprise.
This will open a side panel like the one below:
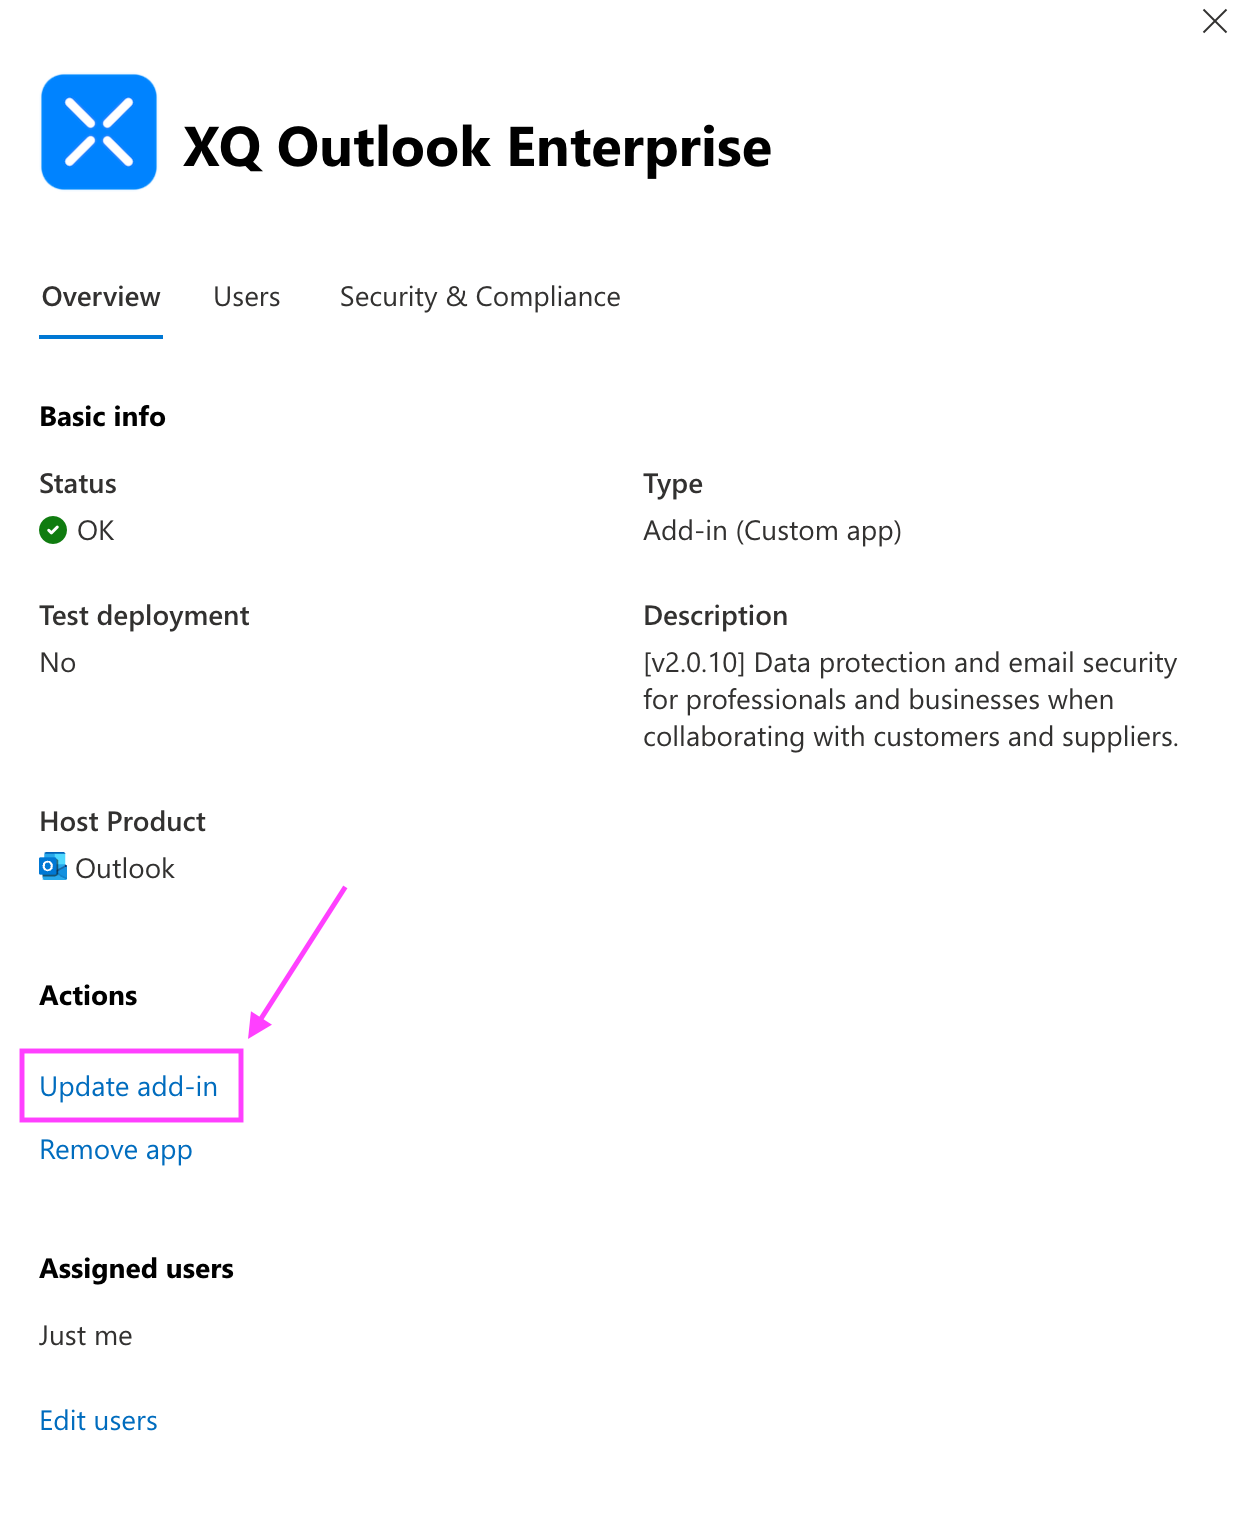
- Click ‘Update add-in’.
- Input the new manifest URL that XQ has shared with you.
Leave a Reply