The XQ Secure Gmail extension allows you to encrypt messages and attachments directly from your Gmail account.
Table of Contents
Video walkthrough
If you prefer, you can also watch a video walkthrough on installing the XQ Secure Gmail extension.
Install the Chrome extension
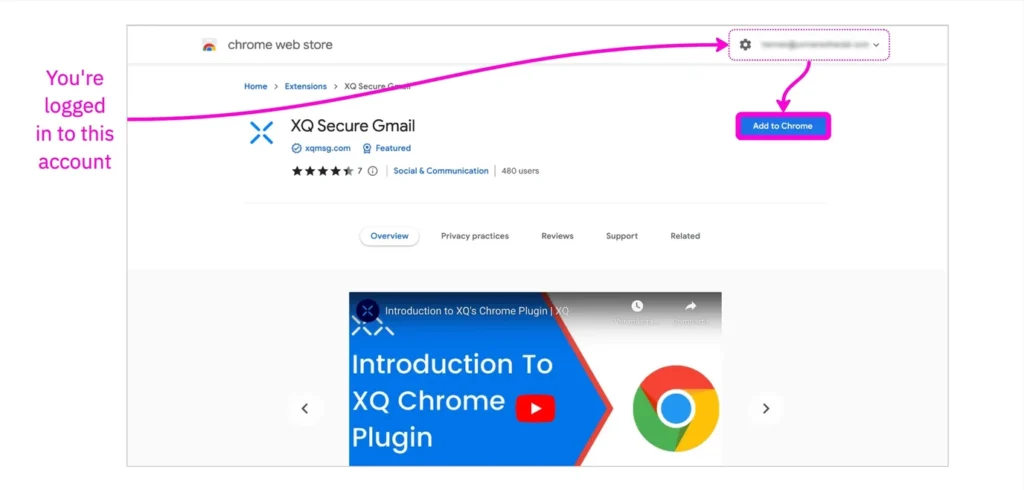
- Open the Chrome Web Store. Make sure you’re logged into the correct account before clicking Add to Chrome.
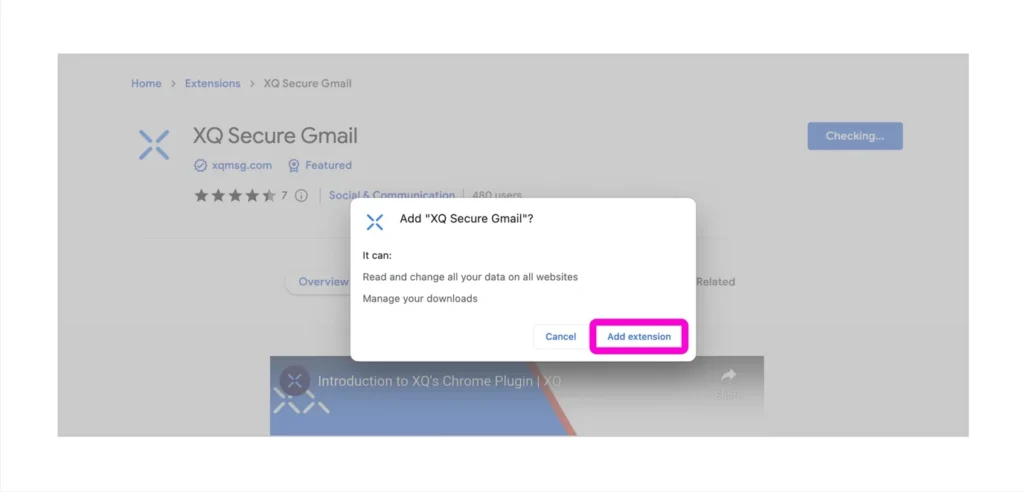
- In the pop-up window, click Add extension. XQ protects your data and it will never be stored or shared with third parties.
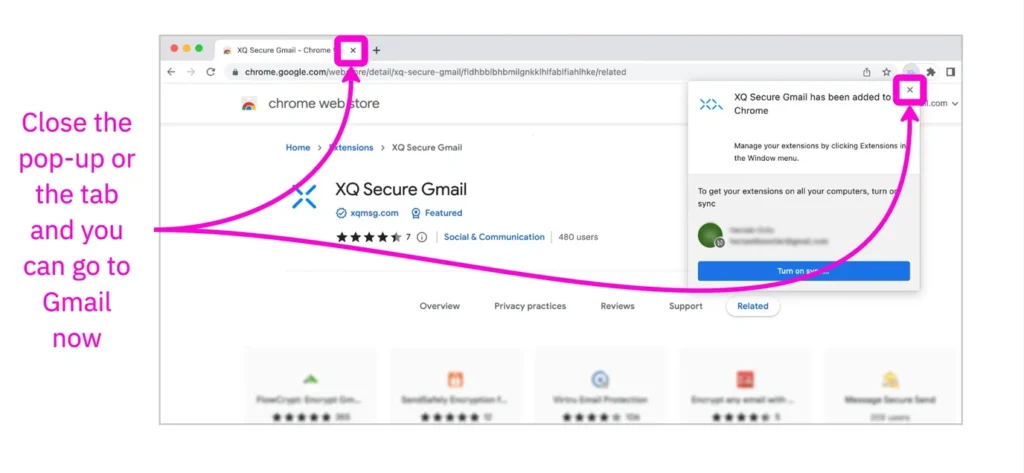
- The Chrome extension will automatically install and be added to your extensions list. Now you can close the pop-up window or the tab and open Gmail to set up the XQ Secure Gmail extension.
Complete Gmail setup
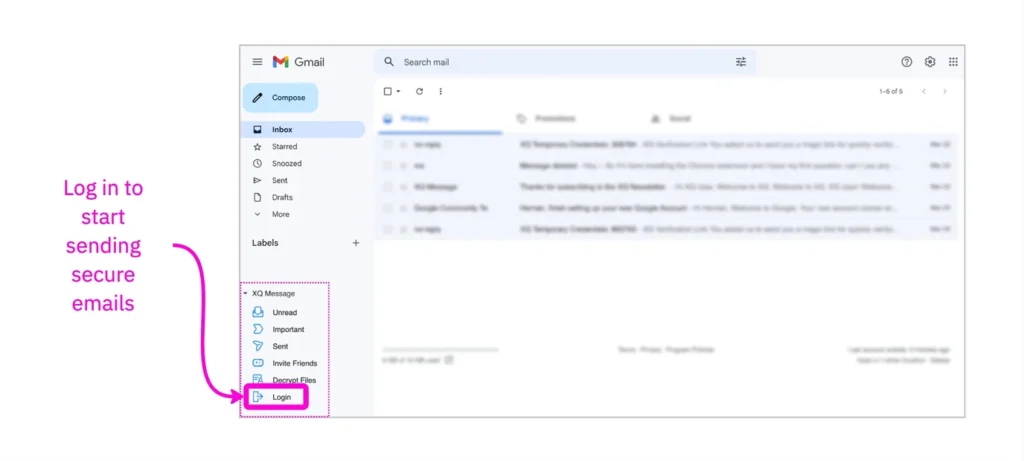
- Open Gmail and log in to your account.
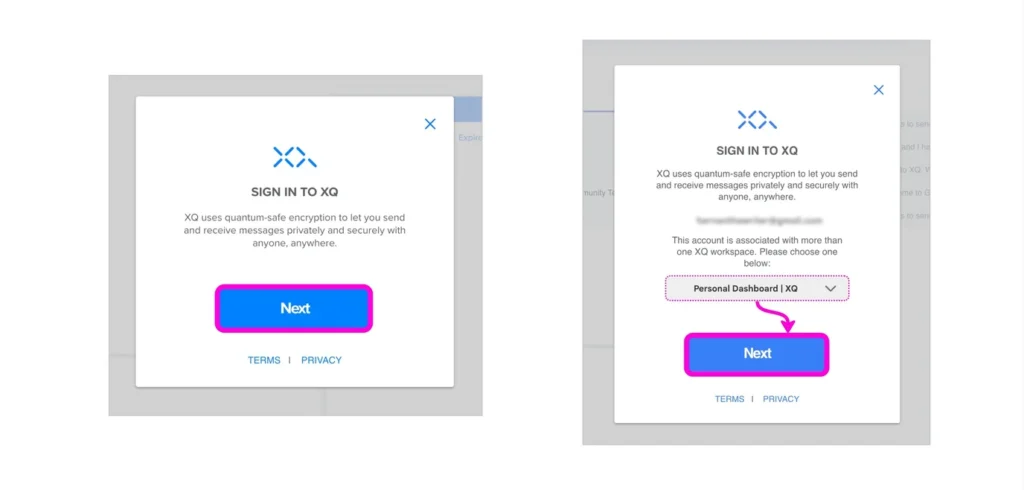
- You will see XQ Message now available in the left-hand navigation bar. Click Login.
- If your account is associated with multiple XQ workspaces, select one in the dropdown menu and click Next. Otherwise, just click Next.
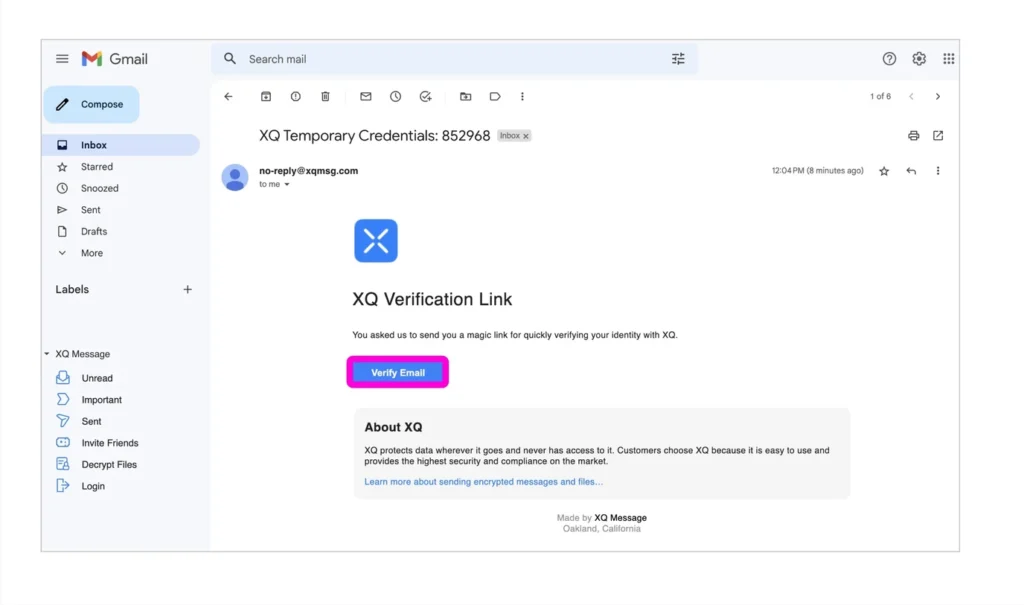
- A pop-up will appear to notify you that a confirmation email has been sent to your Gmail inbox. Click Understood! to continue.
- Open the email from XQ in your Gmail inbox and click Verify Email.
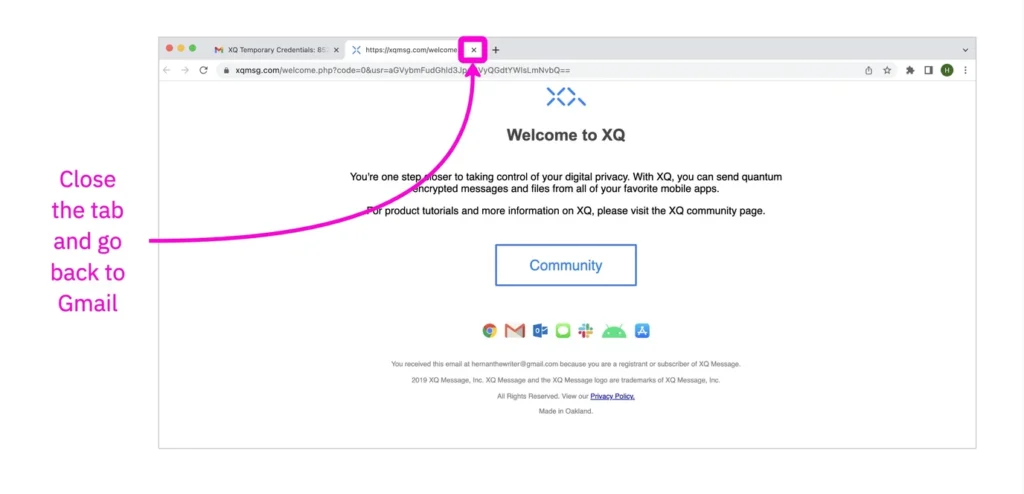
- A new tab will open with a page linking to the community. You can close it and go back to Gmail. Click Login again from the left-hand navigation bar. You will now be successfully logged in. The menu text will change to Logout.
Configure encryption settings
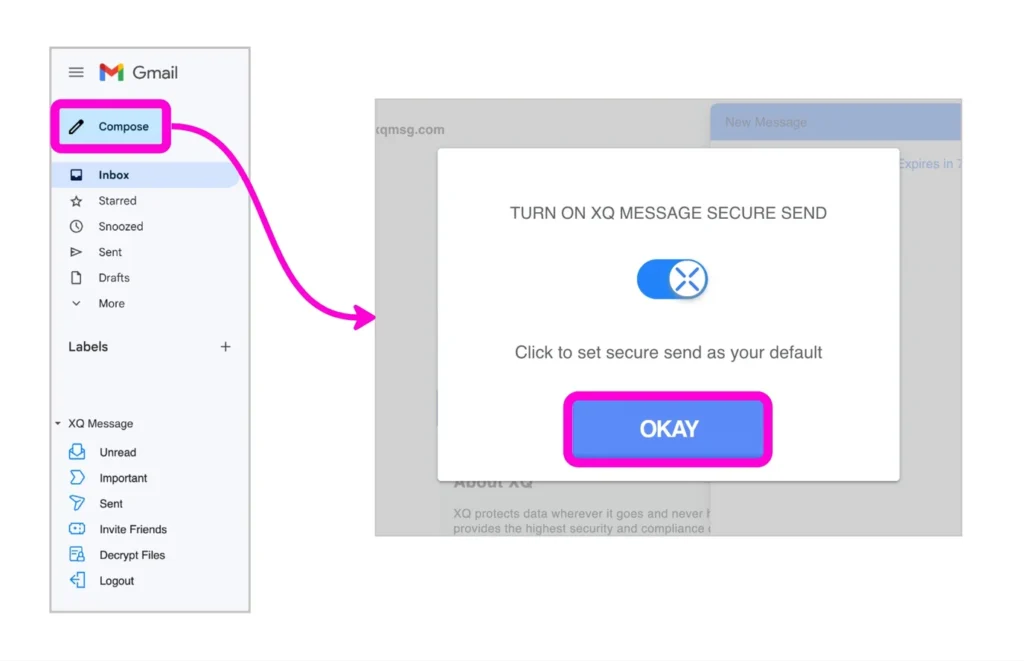
- Click Compose and OKAY in the pop-up window.
- Click the gear icon to open the message settings.
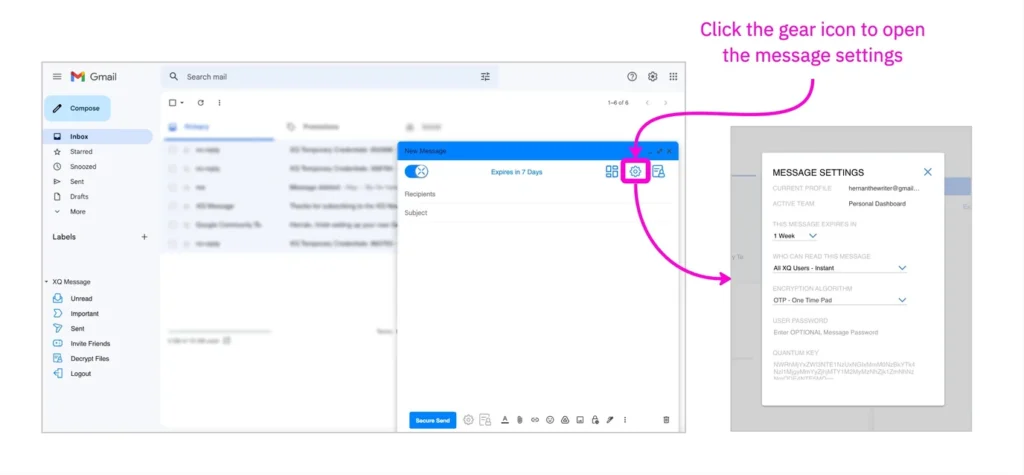
Available settings
- THIS MESSAGE EXPIRES IN – Use this setting to change the expiration time for your message from 1 day to 3 months.
- WHO CAN READ THIS MESSAGE
- All XQ Users – Instant – Encrypted messages sent from Gmail can be viewed by all eligible XQ Users in your Team Workspace.
- Recipients Only – Authenticated – Encrypted messages sent from Gmail can only be viewed by authenticated recipients.
- ENCRYPTION ALGORITHM
- OTP – One Time Pad – Enabled by default.
- AES – Advanced Encryption Standard
- USER PASSWORD – This setting is optional. If you wish to add a password to your secure emails, you can enter a password in this field. The recipient will be required to enter the password to decrypt the email.
Now you’re ready to learn how to send a secure email.
Leave a Reply