Having a verified team adds a layer of security to secure communications by authenticating the identity of the communicating parties.
Table of Contents
Add individual team members
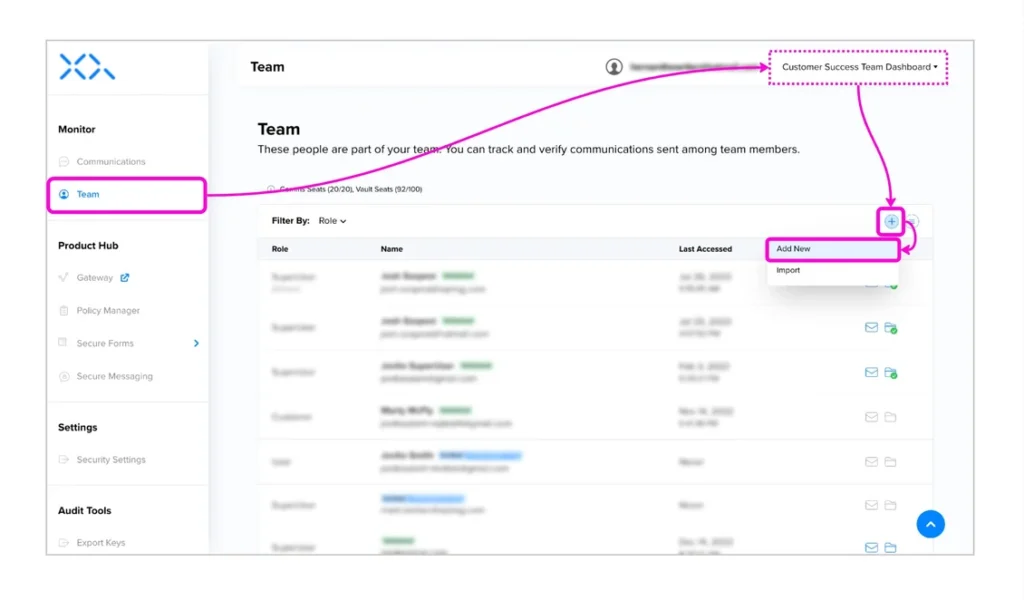
- Open the XQ Dashboard and click Team from the navigation bar.
- Make sure you’re viewing the correct team in the top-right corner of the dashboard. If you’re not in the correct team, click the team menu in the top-right corner, and then select the right one from the dropdown list.
- Click the + icon on the top-right corner above the existing team member list. Then, click Add New.
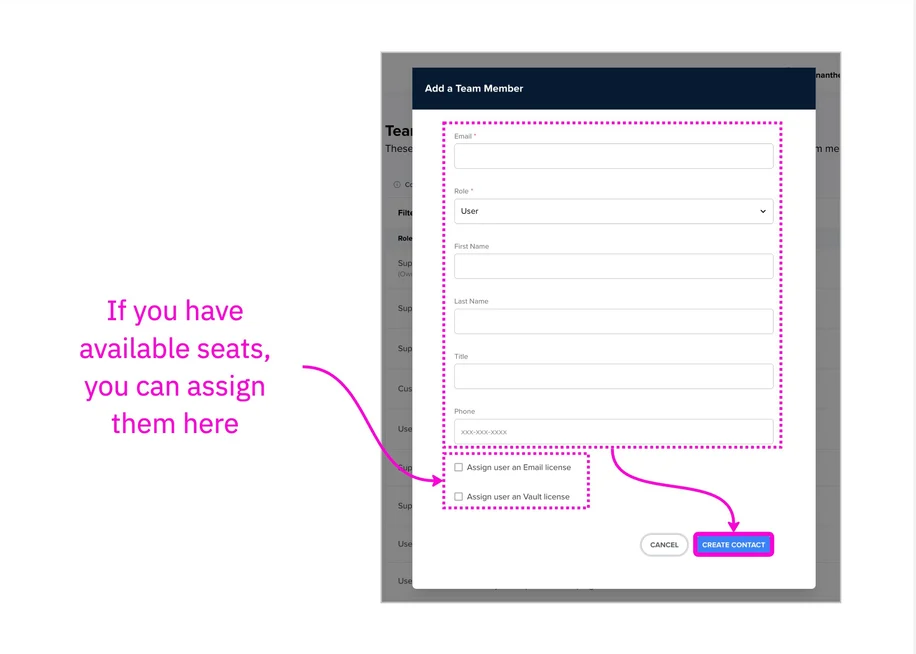
- Fill out the form and choose one of the pre-defined roles from the dropdown list.
- If you have available seats in your account, you can mark the Assign user an email license / Assign user a Vault license checkbox to assign one of those seats to any User, Super User or Admin.
- Click CREATE CONTACT to trigger a confirmation email to your newly added team member.
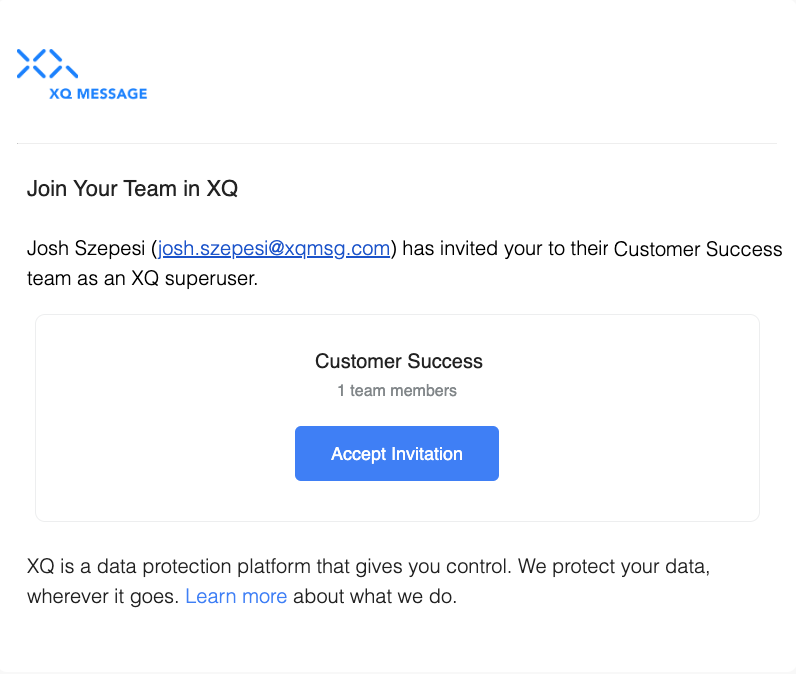
- Your newly added team member will receive an email asking them to accept the invitation. Once they accept, the process is complete.
Add Team Members in Bulk
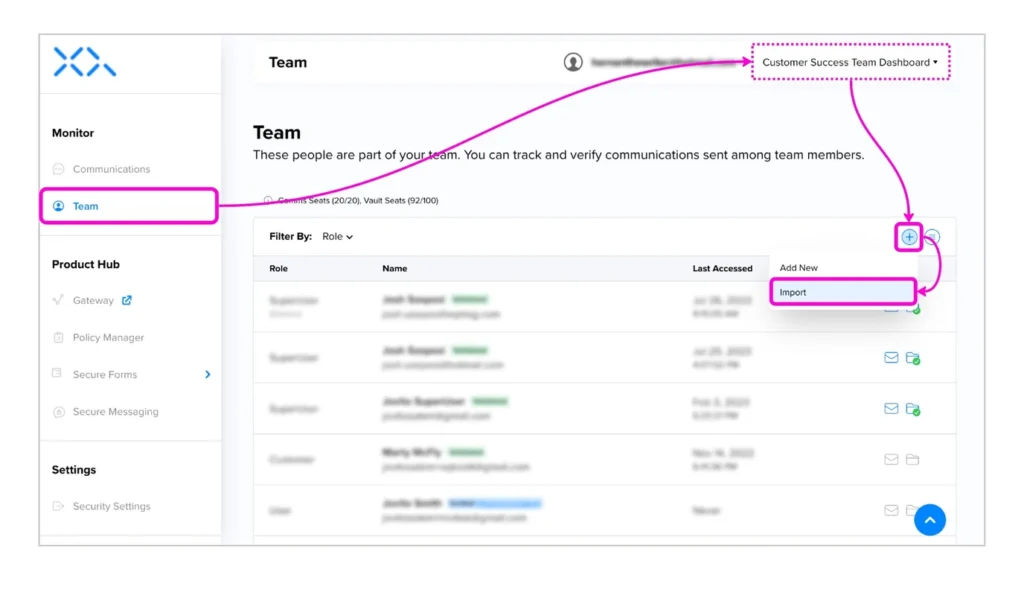
- Open the XQ Dashboard and click Team from the navigation bar.
- Make sure you’re viewing the correct team in the top-right corner of the dashboard. If you’re not in the correct team, click the team menu in the top-right corner, and then select the right one from the dropdown list.
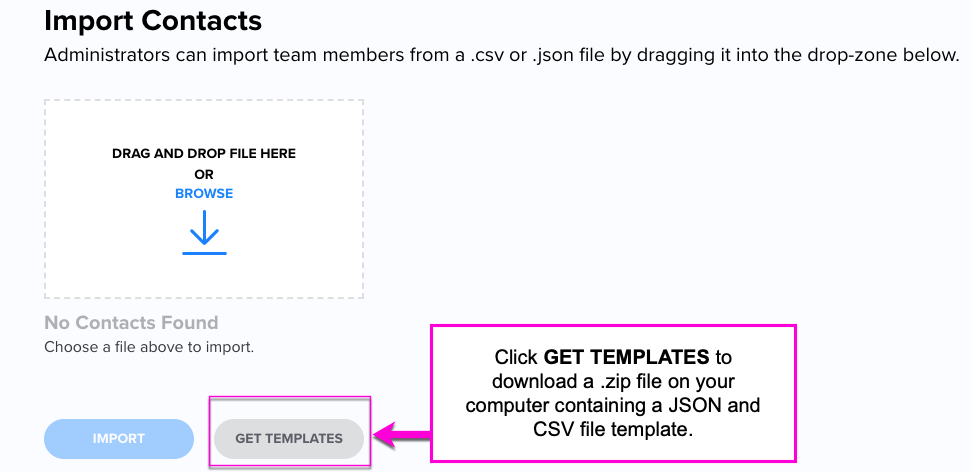
- Click the + icon on the top-right corner above the existing team member list. Then, click Import.
- Click GET TEMPLATES to download the JSON and CSV file templates required to bulk upload contacts.
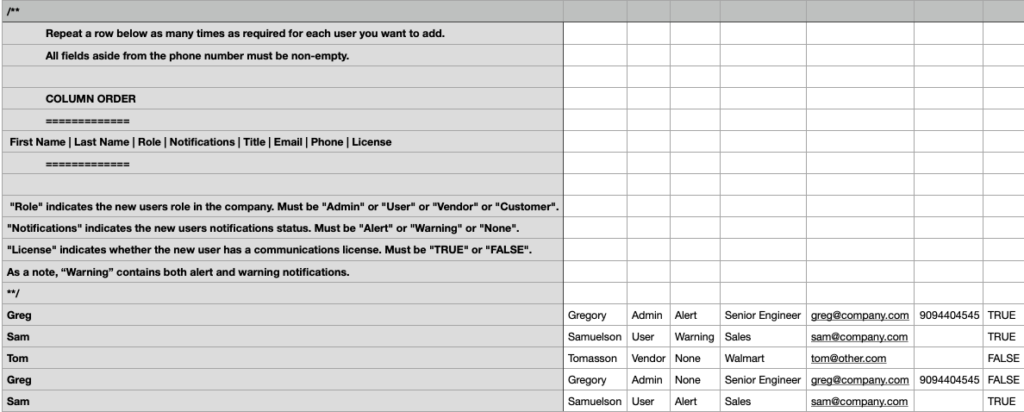
- Open one of the templates from your local file system and input your team members’ Emails, First Names, Last Names, Roles, Notifications, Titles, and Phone numbers.
- The file will contain instructions and demo users showing how to format your team members in the spreadsheet. The following screenshot shows an example from the .csv file:
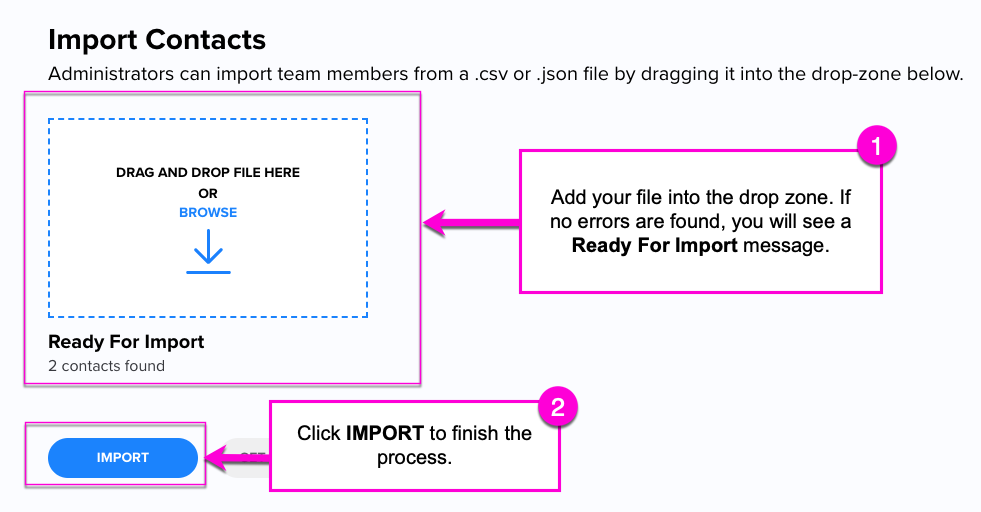
- Once you have populated the spreadsheet, drag and drop the file into the drop-zone or browse for it in your file folder.
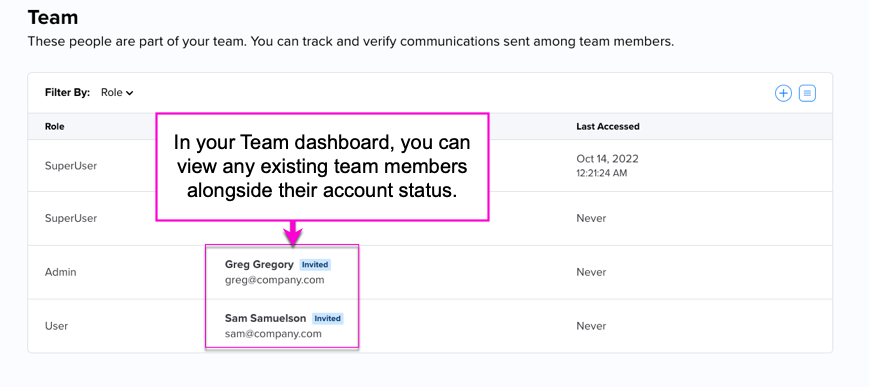
- All invited team members will receive an email asking them to accept the invitation. You can view their status in the dashboard by navigating back to the Team section.
Leave a Reply