Connecting Microsoft Entra ID with XQ enables you to quickly add users, assign licenses, and synchronize groups for use in policies.
Table of Contents
Setup Microsoft Entra ID (Active Directory)
To set up this integration, admins are required to follow the steps below:
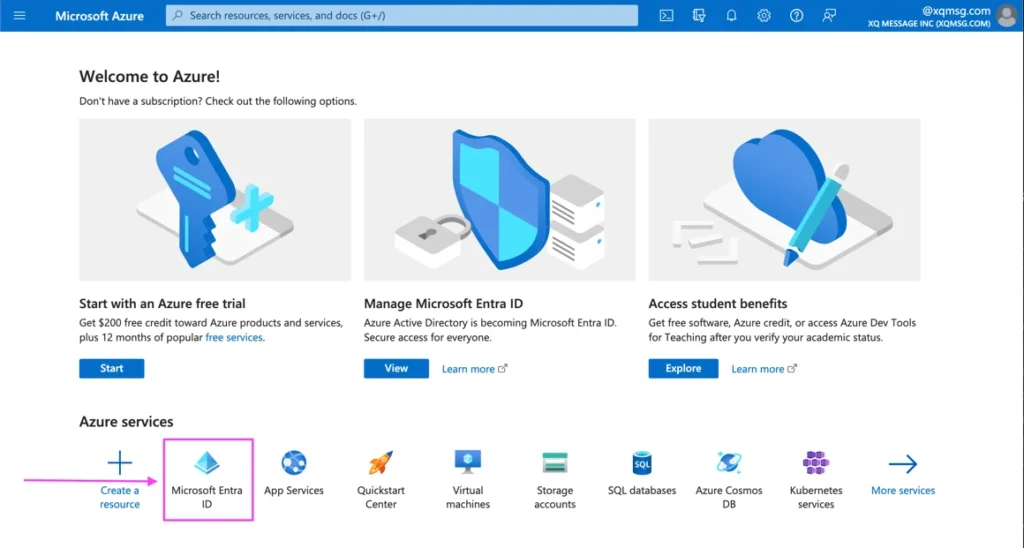
- Login to Azure Entra: https://portal.azure.com/ and select ‘Microsoft Entra ID’ from the list of services.
- Go to ‘App registration’ and select the ‘New registration’ button to create a new application
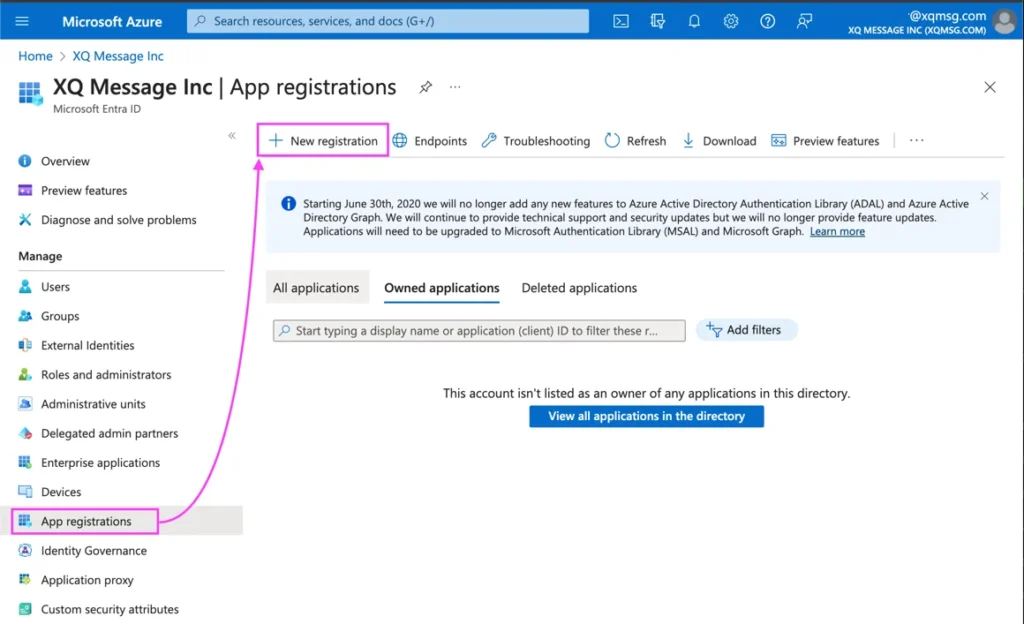
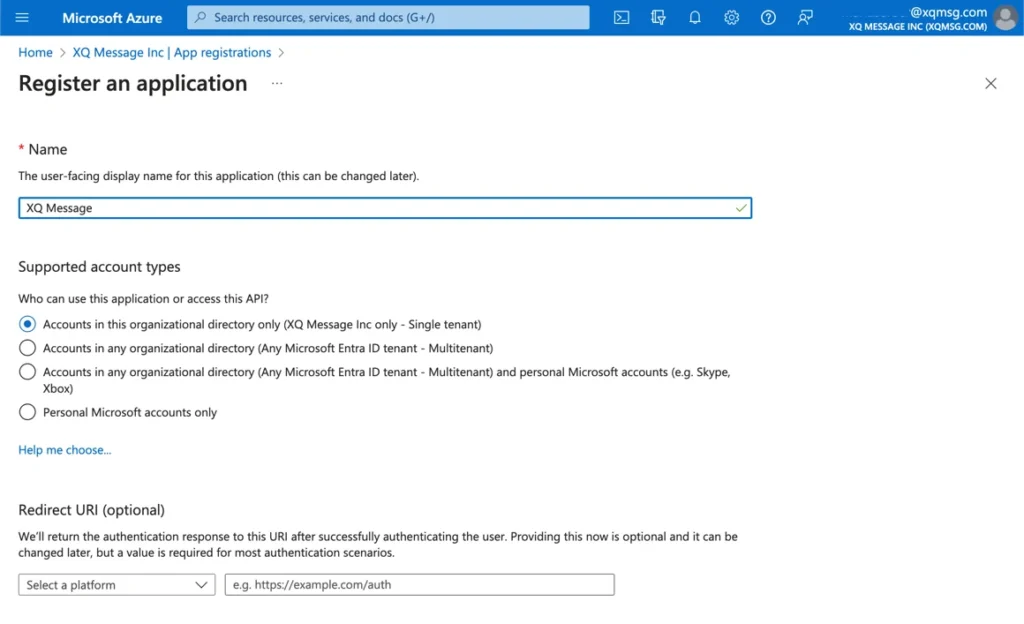
- Provide a name for the application, such as XQ Message, and leave all other fields at their default values. Finally, click on the ‘Register’ button located at the bottom to successfully create the application.
- After creating the application, it is important to grant it permission to read from Entra ID. This permission is necessary for the Entra Application to retrieve user and group information from your tenant.
To grant the necessary permissions, navigate to the left-hand navigation menu and click on ‘API permissions’. From there, select ‘Add a permission’ to proceed.
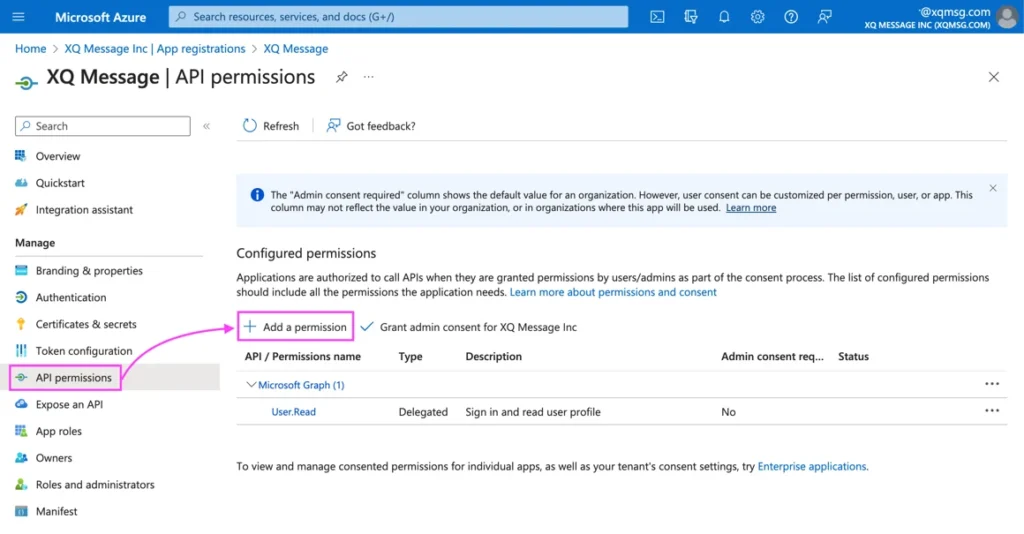
- Select ‘Microsoft Graph’ from the options provided after clicking ‘Add a permission’. This should be the top option in the list.
- In the next step, choose ‘Application permissions’ and enter ‘Directory.Read.All’ in the search field. Expand the menu, select the checkbox, and then click ‘Add permission’ at the bottom.
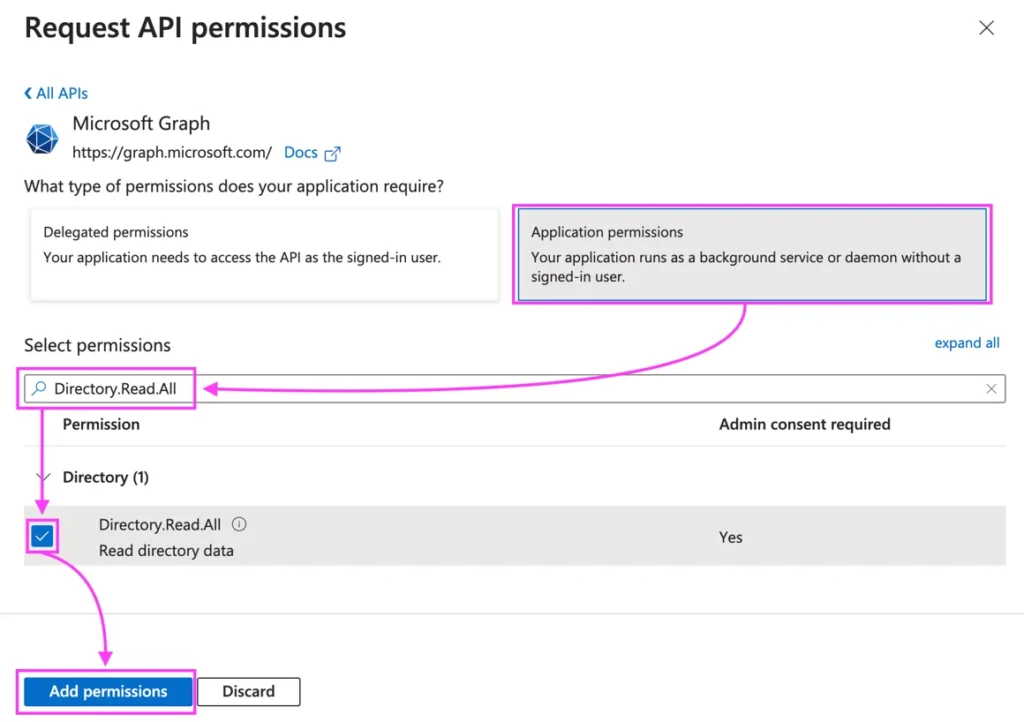
- To proceed with this permission, you need to take an additional step: granting Admin consent. Simply click on the ‘Grant admin consent’ button to provide the necessary authorization.
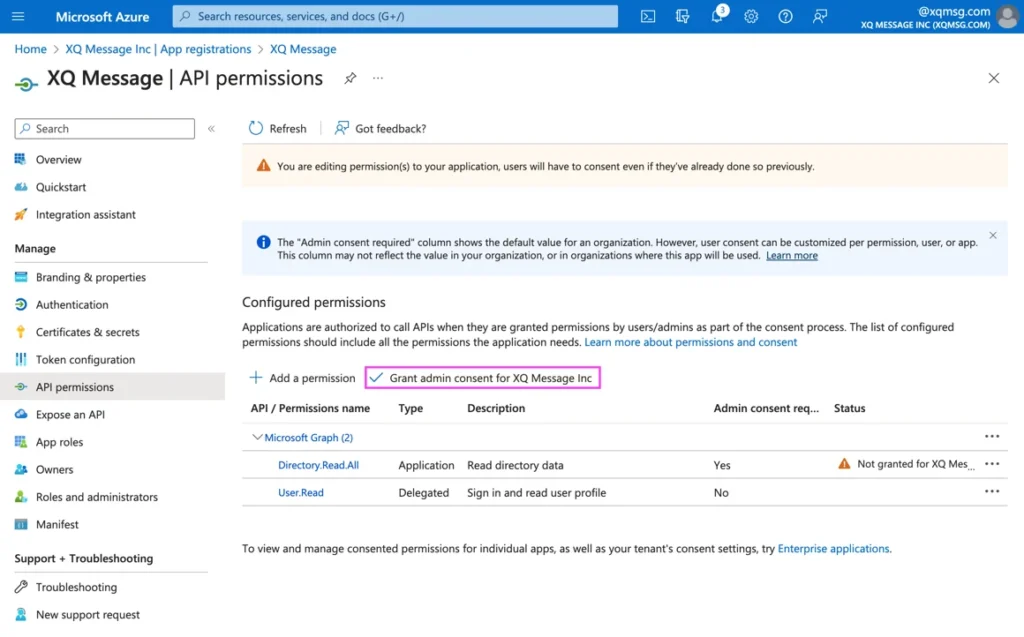
Note: It is crucial to complete the granting consent step before moving on to step 8 below.
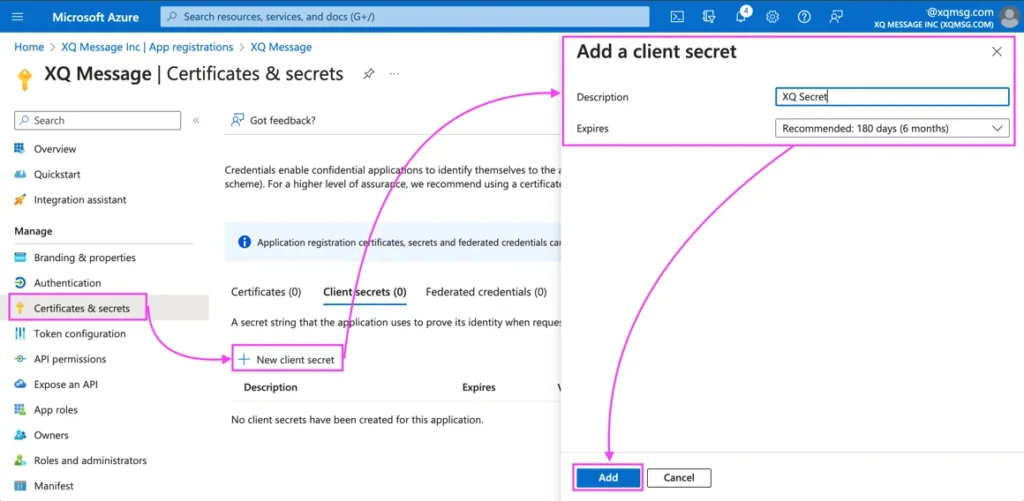
- To grant XQ the ability to read from your Entra ID application, you will need to create a Client Secret. This Client Secret serves as a secret key that authorizes XQ to access your Entra ID application. To create this secret, simply navigate to the ‘Certificates & secrets’ option in the left-hand menu.
You can name your secret whatever you like, similarly with the expiry. Just keep in mind that you’ll need to create a new secret when this one expires.
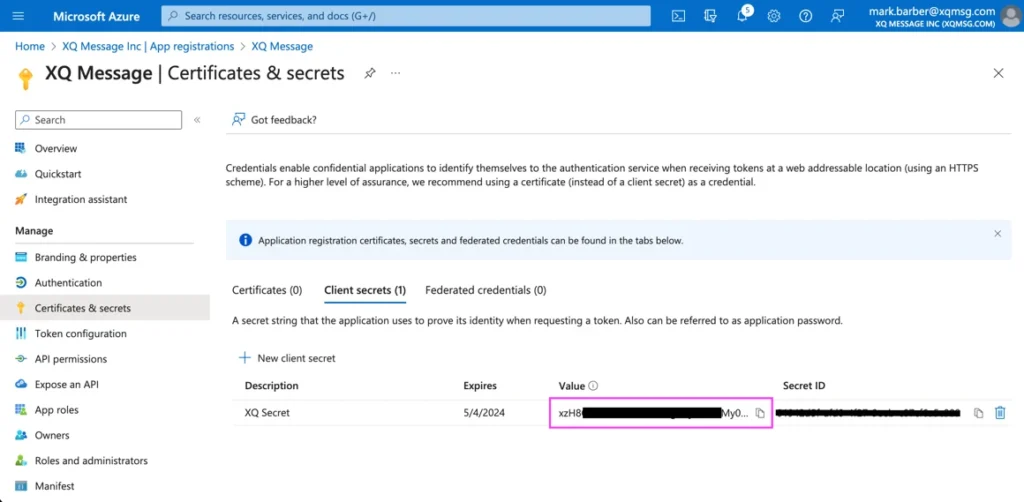
- Once you have created your secret, it is important to make a copy of it as it will not be accessible again. This secret will be needed when configuring the integration on the XQ dashboard.
- Lastly, click on the ‘Overview’ tab in the left menu and make sure to keep this page readily available. It will be required for the configuration process on the XQ dashboard.
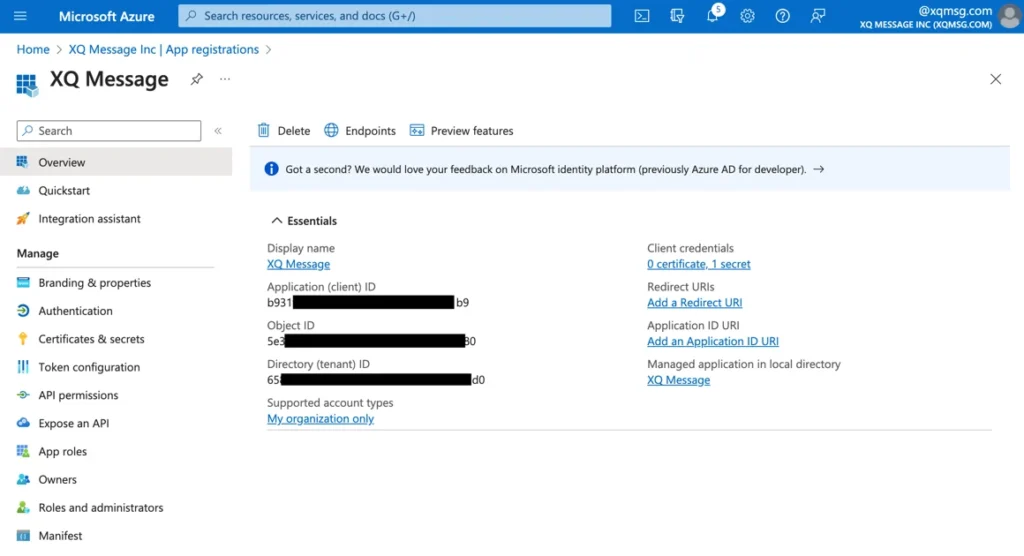
Configuring the Entra ID integration with XQ
- Go to the ‘Integrations’ menu on your XQ Dashboard and click on ‘Configure’ to set up a new user synchronization: https://manage.xqmsg.com/security-settings/integrations
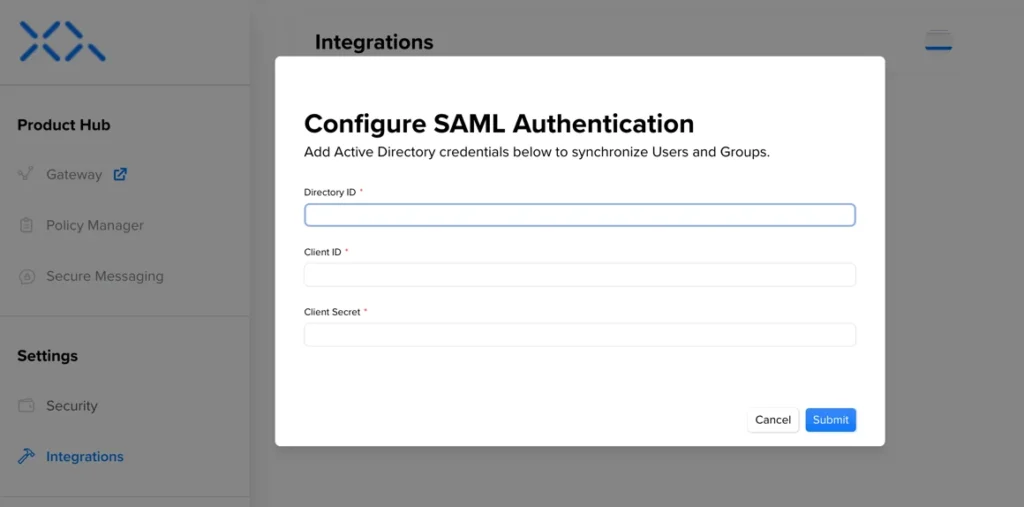
- Copy and paste the values from Entra ID into the XQ Configuration modal. Including the secret you copied when it was created.

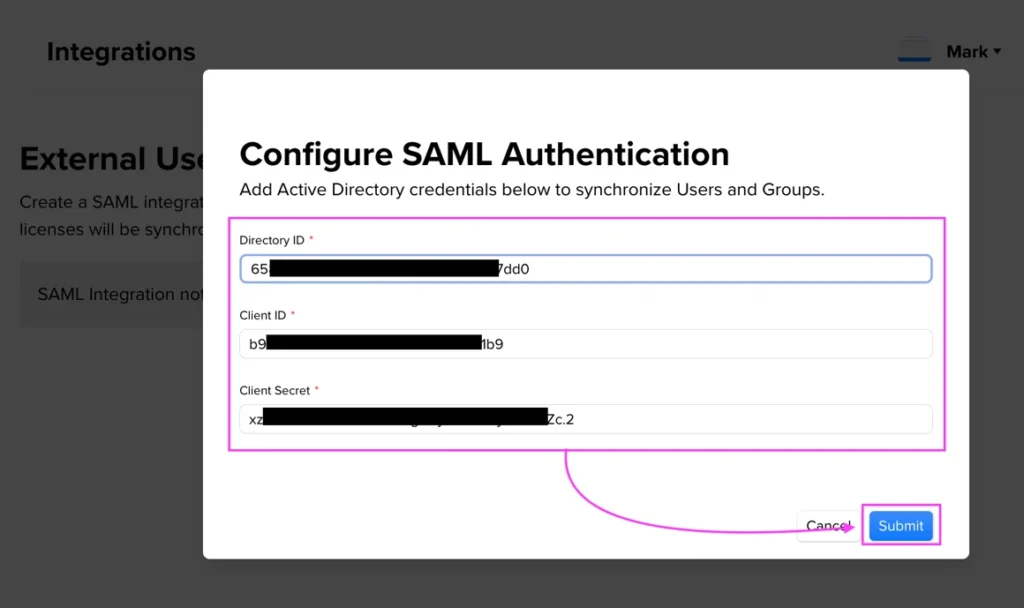
And finally press ‘submit’.
- Now that the integration is configured, it is time to add groups for XQ users.
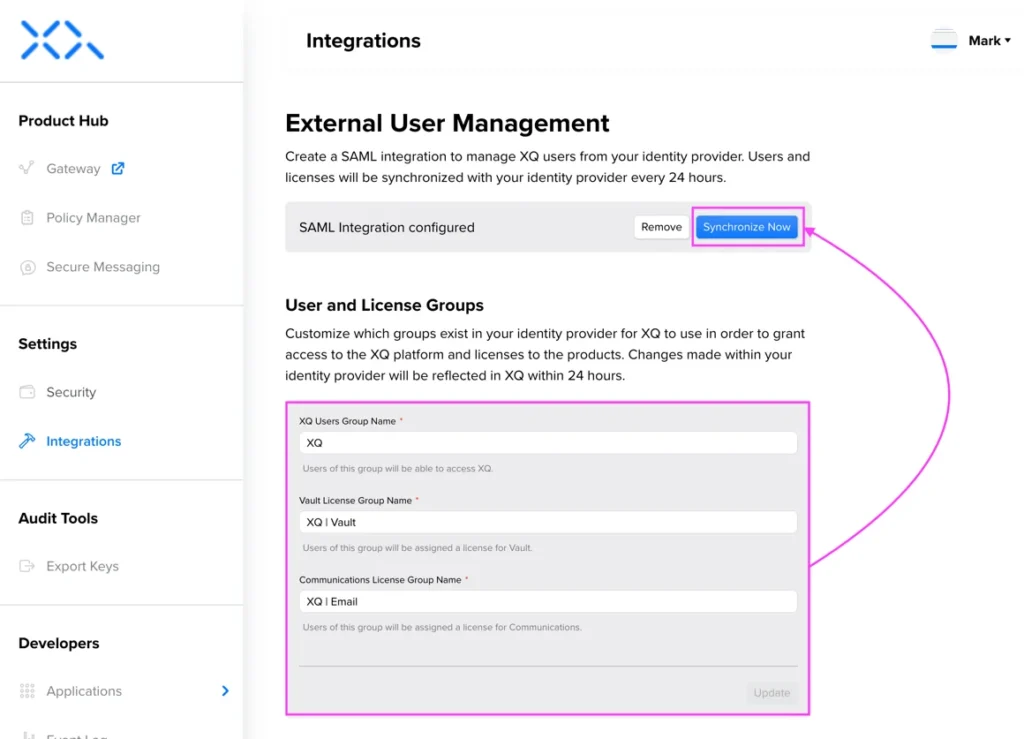
- There are three groups to synchronize from Entra ID (if you don’t have Vault or Communications licenses for your team, these fields will not be available):
- XQ User Group Name = users who will be added to your XQ Message team.
- Vault User Group Name = users who will be assigned a Vault license Vault.
- Communications User Group Name = users who will be assigned a Communications license.
- Note: If a user is in the Vault or Communications Group, but not the XQ User Group, they will not be added to the team and so will not be assigned a license.
- When the group names have been copied, click ‘Update’ and then ‘Synchronize Now’ to update your team and licenses.
Groups and XQ Policies
In addition to synchronizing groups for users and licenses, you are able to synchronize Entra ID user groups for use in XQ policies. To do so, Groups needs to be added as “Policy Groups”.
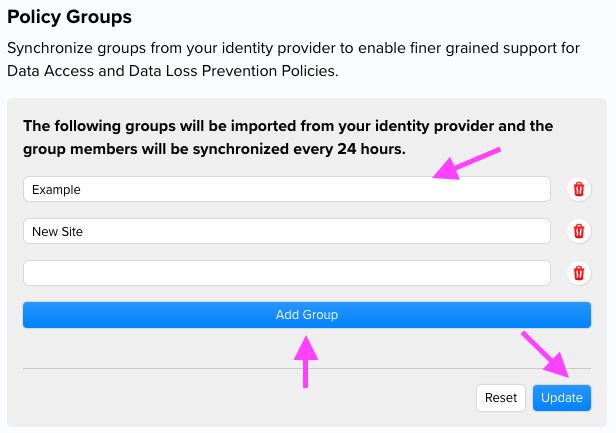
- If you are not already there, navigate to the the ‘Integrations’ menu on your XQ Dashboard and scroll to the “Policy Groups” section.

- Next, type in the name of any Groups that you would like to have access to for use in Data Policies. The “Add Group” option simply provides another line for you to add a Group to.
- Here is an example of a use-case for this functionality for your reference:
- All members of your company need to have XQ licences for Vault.
- An IP restriction is created to ensure access is only possible from the office.
- However, your Sales Team travels often an needs a more permissive access rule.
- Adding the “Sales Team” as a Policy Group will allow you to create such a rule.
- One Done, Choose “Update”.
- Lastly, if you would like to see your updated immediately, select the “Synchronize Now” option at the top of the page. Otherwise the changes will be reflected within 24 hours.
Leave a Reply